
![]()
![]()
![]()
![]()
![]()
![]()
![]()
![]()
![]()
![]()
![]()
Helpful Links And Things
Link to My Fan Wiring This was developed for my race car. The intent is to have a three position toggle switch. In the up position it will keep the primary fan on all the time. In the middle it will put the primary fan in auto mode or in the stock configuration. In the down position it will turn both the primary and the fan that used to be for the AC on all the time.
Link to Wiring a Basic Relay This is the wiring for a basic relay. Use it at your own risk.
First off if you have any questions or comments about anything you see or I discuss on this page please email me at dsmith@radio.fm.
The Story
Well where do I start. This is my Porsche. I can not afford a 911 or most any other rear engine Porsche and being that I came from the school of American muscle. The 944, 951, and 928 have always fascinated me. I ran into this car about a decade ago. I was hooked. In my mind the perfect car. It had the motor and the suspension of the now infamous 944 but was hiding it under the skin of the 924. I love a "sleeper" I worked on it several times making modes for the owner but as time went on it would show up less and less. Finally fading into the past as did the owner. But the car was never forgotten. I don't know if anyone has ever had a car that they really wanted. Or a car that a friend had that you really wanted to own well this was mine.
Well fate is a funny thing. I came upon the car some 6 years later. It had been sitting in heated storage for the better part of 5 years. It turned out that the former owner had had a sudden change of hart about racing and also a sudden move to the west coast. The car ended up in my friends garage. The car had never been registered it was one of those temporary storage agreements that ended up being permanent. "My" 924s was however not in the greatest shape. The motor was hurt and the color had been changed to a dark green (more on that later) but the rest of the car was all there. All the suspension components the db wheels the recaro seats everything. I even got a box full of new cool carbon brake pads and many spare parts that I had carefully packed away years ago. It also had three complete sets of rims and tires. One set of three piece DB racing wheels with R1's, a set of 5 stock 928 rims with 008's, and the original phone dial rims with D60 m2's (rain tires) All the tires were virtually new but the R1's were dammed due to age and had to be tossed.
Well I was made an offer that I could not refuse. Get it out of his garage . So the deal was done. I took position of My 87 924s immediately.
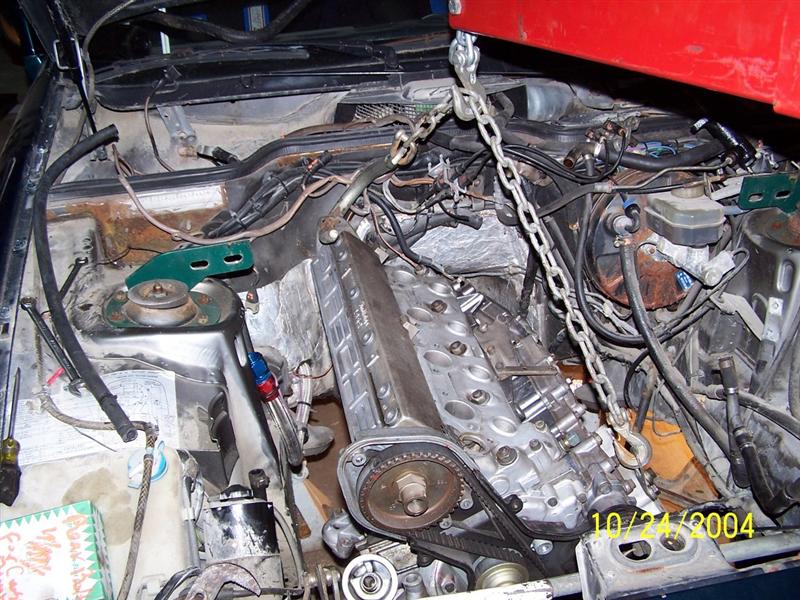
Here are some photos of my car. I am currently in the process of replacing the motor. The 89 motor that had the entire rotating assembly balanced including the balance shafts and the timing belt rollers (yes this does make a difference). It had new pistons and rods as well as a new block. It had a ported and polished head. It was probably one of the strongest motors I have ever driven.
It died a sudden death. The fatal blow was dealt by an errant battery on the track from a wreck. Two cars got together entering the "bus-stop" at the Glen and a battery squirted out of one of the carsr. I now know what happens if you hit a battery "at speed".
We discovered that running over a car battery can have some really bad effects on a car. It could have been worse except that the weltmister sway bar hit the battery and exploded it in to a million pieces. It occurred to me that it could have hit the transmission or the rear suspension. However the fatal blow had already been dealt to the front of the motor and radiator and the fans. The motor was soon to expire.
A side bar note here if you hit a battery and you are offered a tow back to the pits don't be the hero; take the tow. Also if a course worker says your car looks ok after you hit something go to the pits and inspect it for your self!!!!
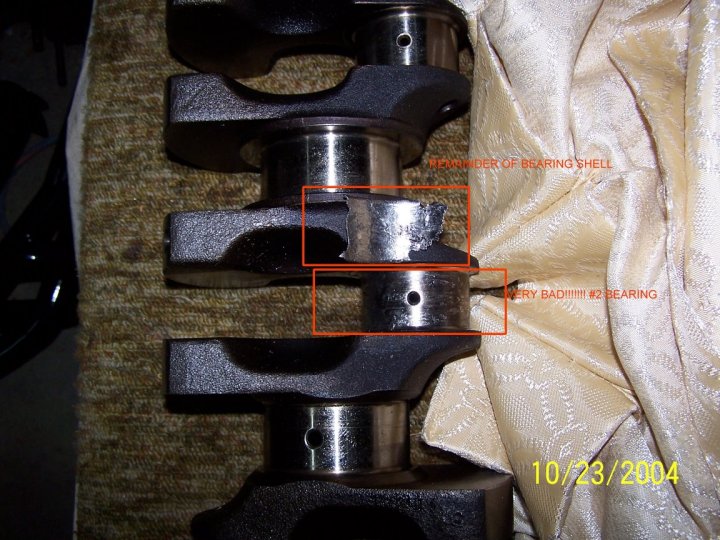
I basically lost the lower end of the motor to the battery hitting the crank and bending the pulley. It also loosened the bolt on the end of the crank shaft and caused the oil pump to freewheel. The #2 barring went south shortly there after. The resulting barring failure caused scoring of the pistons and the walls of the block. The only part of the motor that was not damaged was the head. But it will require complete disassembly and cleaning before it can be put into service again. It was / is very frustrating as this motor had less than 10 hours of run time on it. I will be building another race motor but for now I am putting a warmed over motor I got from a friend that should get the car along quite nicely. It was the backup motor to his 944 race car with less then 10 hours of run time and no track time.
About the new motor. My friend just smiles when I ask him what he did to the motor. I should explain that he is also a racer and instructs other Porsche drivers/owners at the track as well as having a shop that only services Porsches. He will do anything from the complete construction of a race car to an oil change on the daily driver. It just has to be a Porsche. He has recently given up on the front engine Porsches. Simply put he says that the rear engine cars seem to have owners that have more $$ to spend on there cars. He also commented that unless you spend allot of $$$ on the oiling system on the front engine cars you are destined to have oil starvation problems. The dreaded # 2 barring failure due to sustained high G cornering. He got sick of tuning cars to go fast but the owners would not upgrade the oiling system. They would then go racing and blow up the motor and he would have to listen to them or get blamed by them. Anyway this motor I am putting in is from his 944 track car. It is the spar that was pulled due to what appeared to be an overheating problem. It later turned out that there was a fault in the wiring system and the motor was fine. The motor only has one test session on it (about 4 hours). I had to pull the pan just to inspect it and found that the entire inside of the block and the pan have been smoothed to a near glass like finish. I can not wait to see how it runs.
UPDATE 03-09-05. It runs!!!! and boy is this a strong motor. I have not got it out on the road / track yet but I can feel that is is allot stronger than a stock motor.
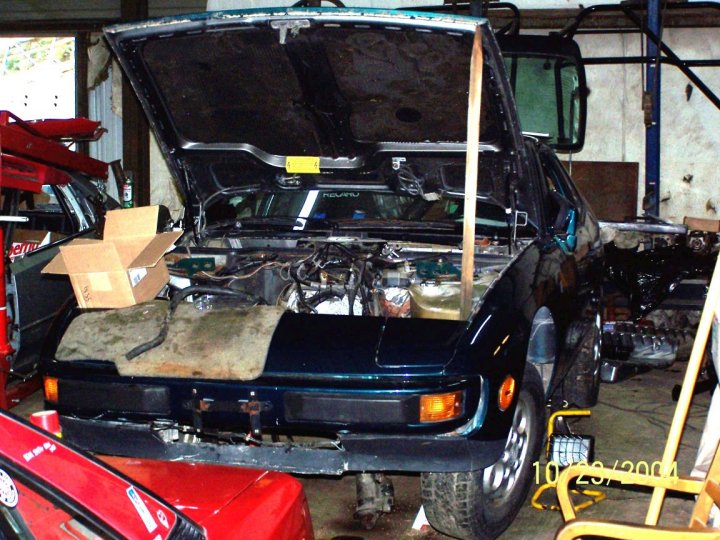
| Couple of photos of the car. Yep it is dodge truck
green. I got it that way. It does not look bad as race
cars go. BUT it is a very poor job for a Porsche and will have to be
corrected. The paint job did not include a complete
disassembly of the car so the underside of he hood is still gray as
well as many other things that should have been painted. The
bottom line is when it is time to repaint it again I will be
bringing it back to the original gray but for now it is green. It is amazing how much stuff accumulates when you take the motor out. If you have not done this the biggest thing is to be organized. I have a bunch of plastic and cardboard box' (from microfilms) that I use for putting nuts and bolts and small parts in for each assembly as it comes of the car. Make sure you label the box's Other than that you need a floor jack and an engine hoist and a creeper is helpful. the only special tools required are Torx drives and metric Allen wrenches if you consider these "special" |
 |
 |
 |
| Two methods of storing Nuts and bolts. The first is to put them in to a box or tray with the part and label the box. the second is to put them back in to the part. I use both depending on the item. |
 |
 |
|
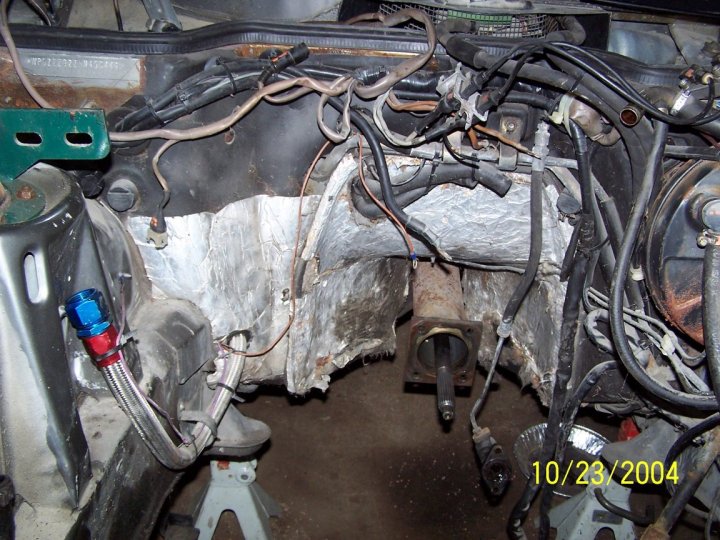
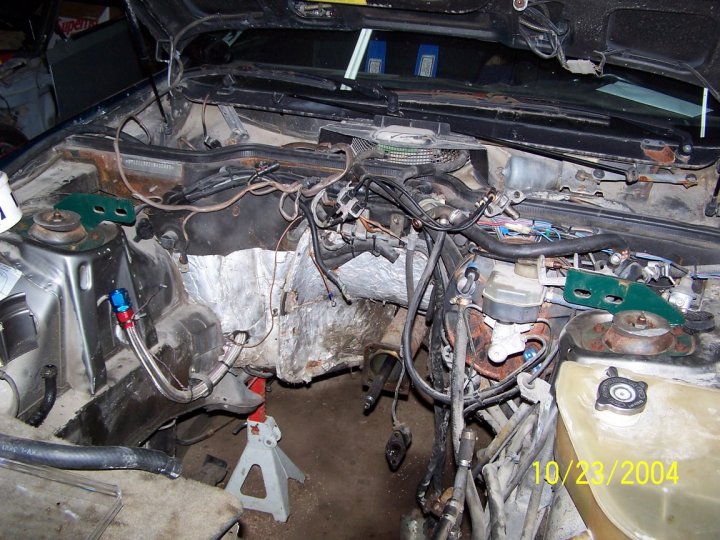
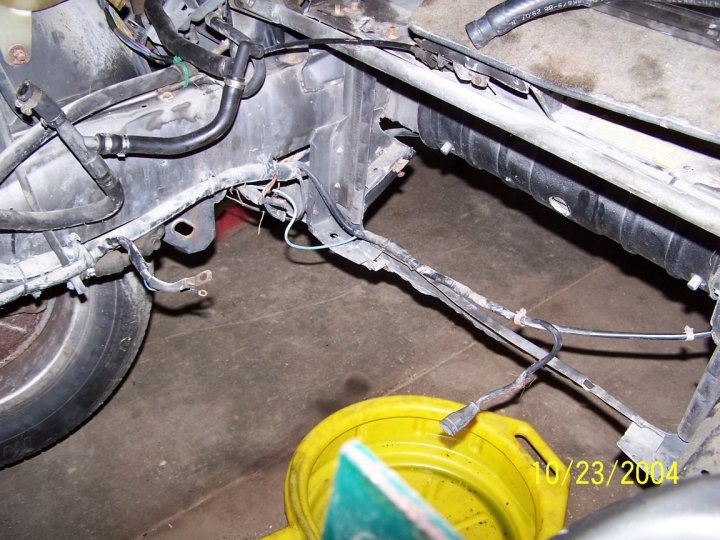
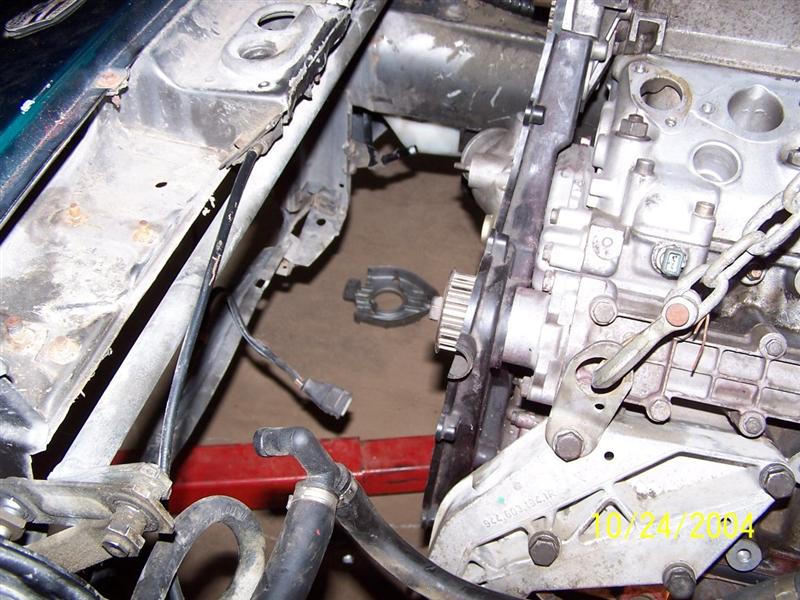
| Photos of the engine bay less the motor. The far right photo is where the battery came through/under the car. I have straitened the lower radiator support. I will have to fabricate a new screen for the for the opening under the bumper. I may use some heavy duty steel screening used in gravel sorting equipment. I will be putting a front mounted oil cooler up there in the near future so I need it to b protected from debris |
 |
 |
 |
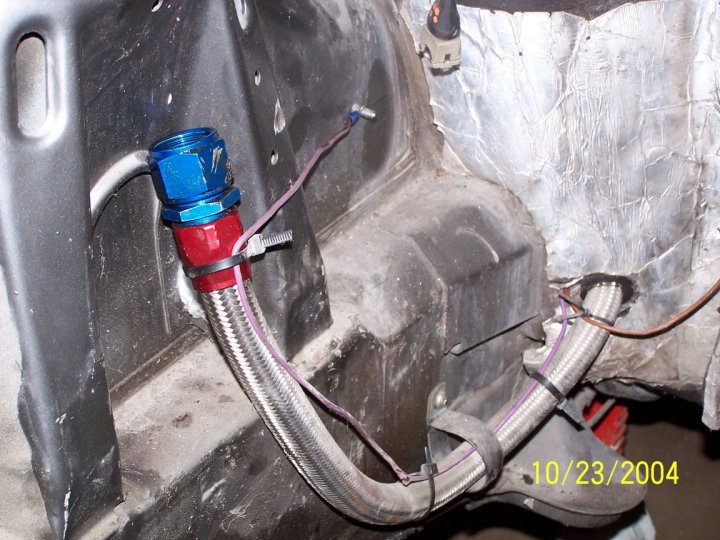
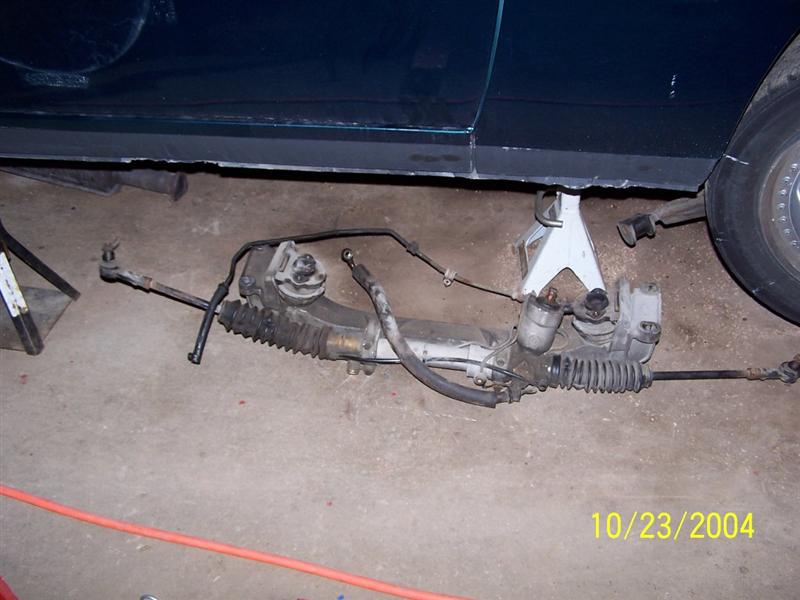
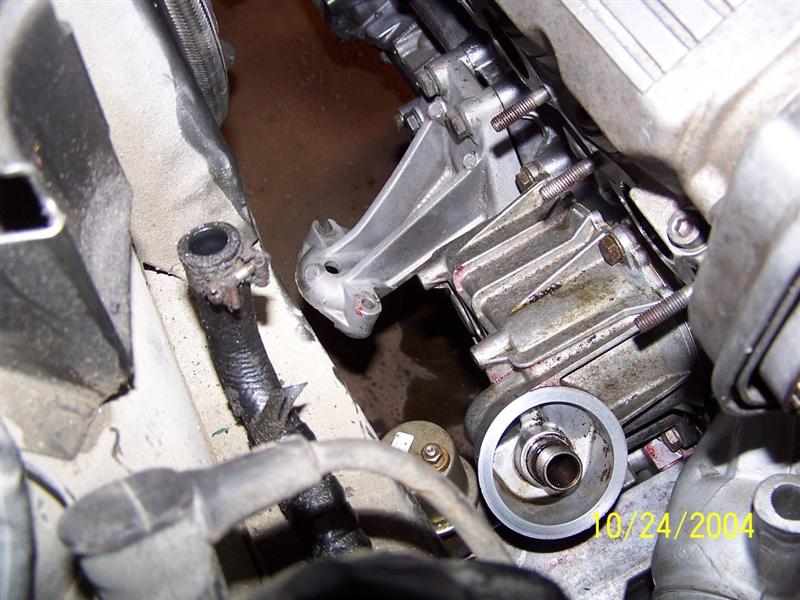
| The large hose with the blue fitting is the connection for my Accu sump. See the photos of the interior further down.. |
 |
 |
|
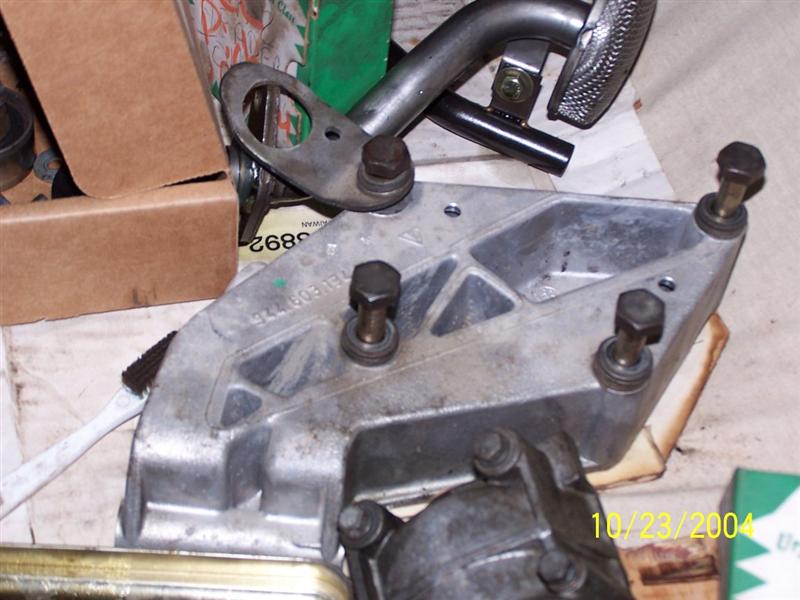
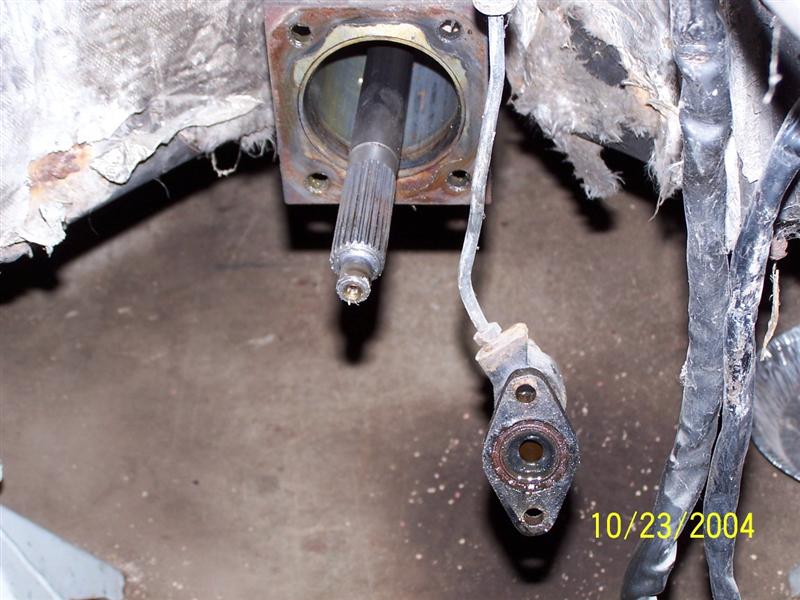
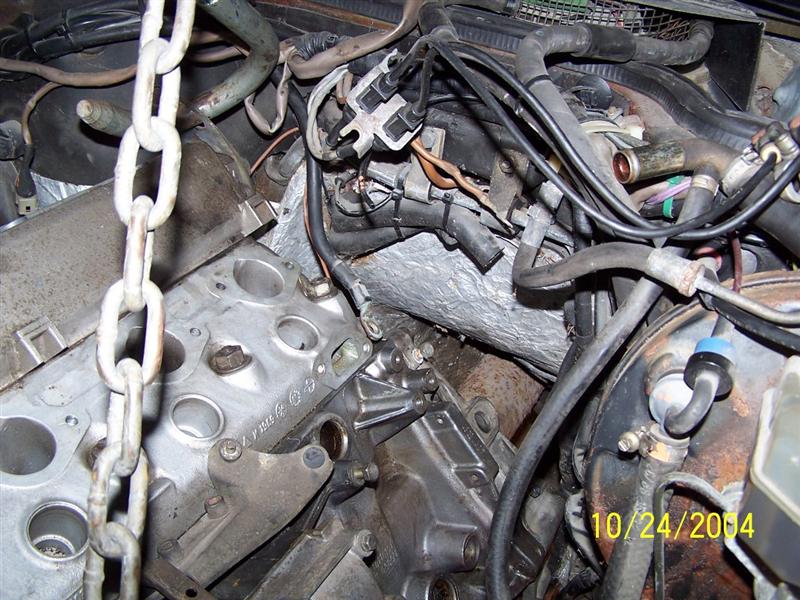
| This piece is a pain to get out it is the cross member. I don't exactly follow the book here. I remove it with some of the lines and remove things in a manor that makes installation a bit simpler. |
 |
||
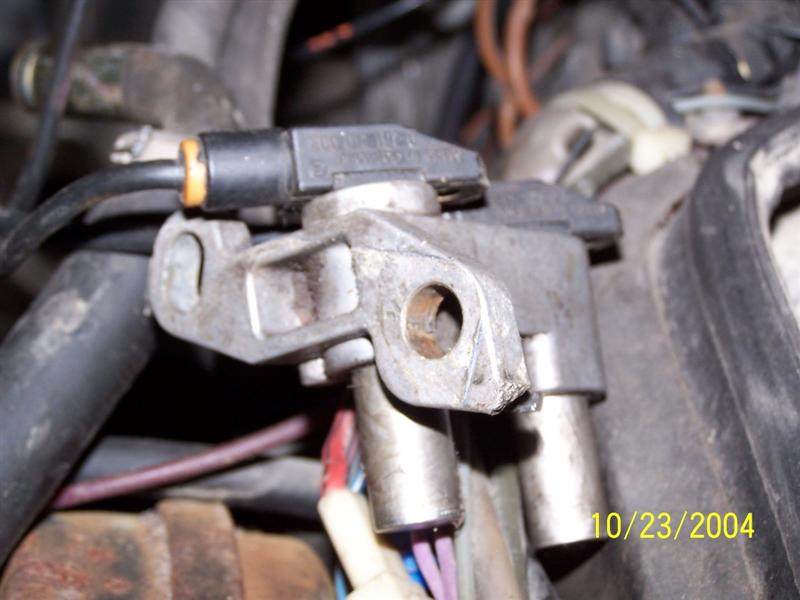
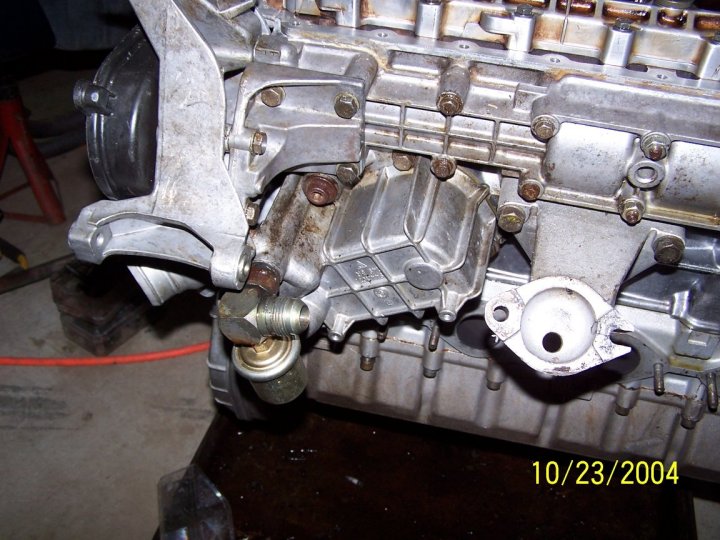
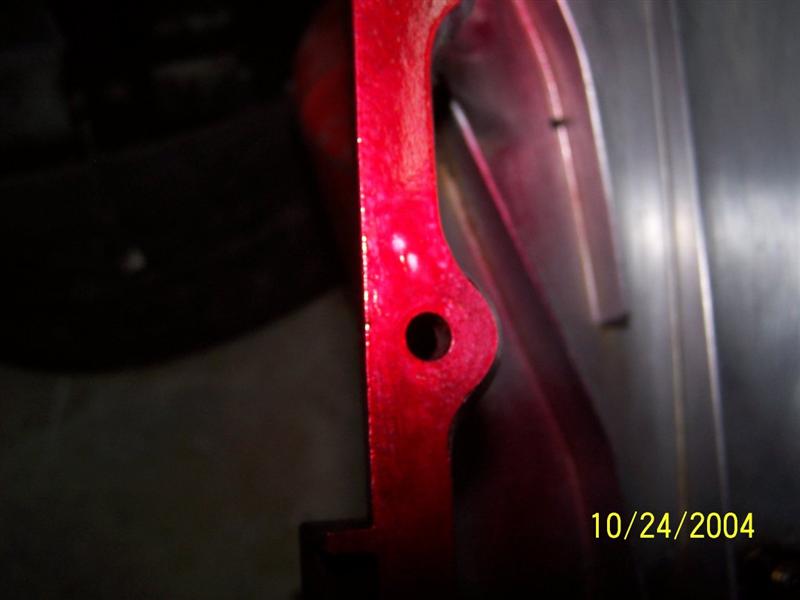
| DON'T BRAKE THESE. These two censors are very expensive. Also you need to make sure that you install them in the correct location. The answer to this is to scribe the part as well as label the sensors and remove sensors and the bracket and reinstall the sensors back in to the bracket. If you install these wrong your motor will not run. Damage these and you will be out some serious $$$$$ |
 |
||
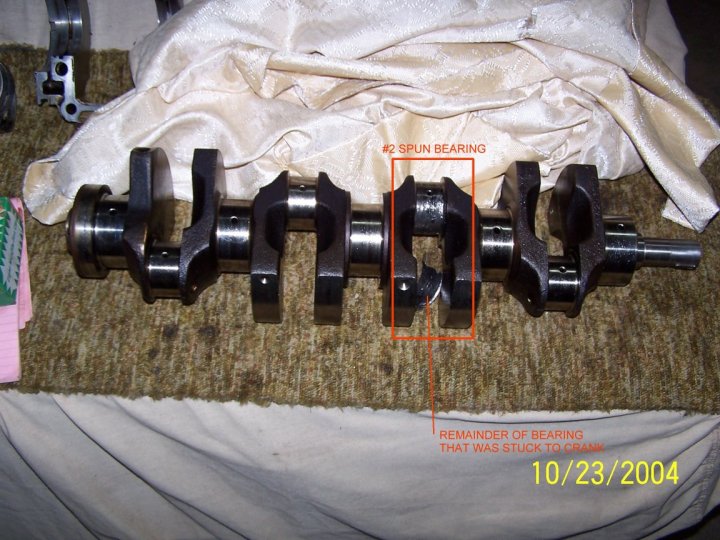
| The ill-fated crank and a bunch of other parts that came off the motor that I took out. In the two other photos of the crank you can see what happened to the crank and the #2 barring. |
 |
 |
 |
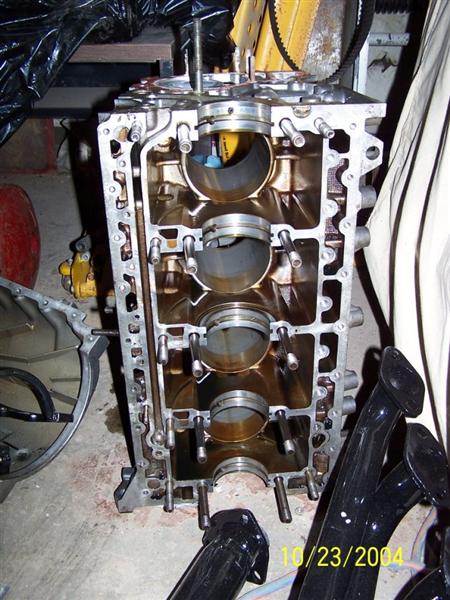
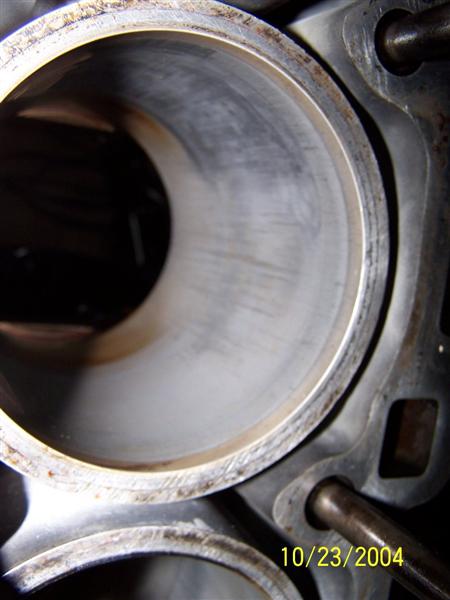
| Hay a new block.... . Ohya that is my block with scored cylinder walls. Considering the cost of oversized pistons boring is out of the question. Since it is aluminum it doesn't even make a good boat anchor. Wonder what the scrap value is on these. |
 |
 |
|
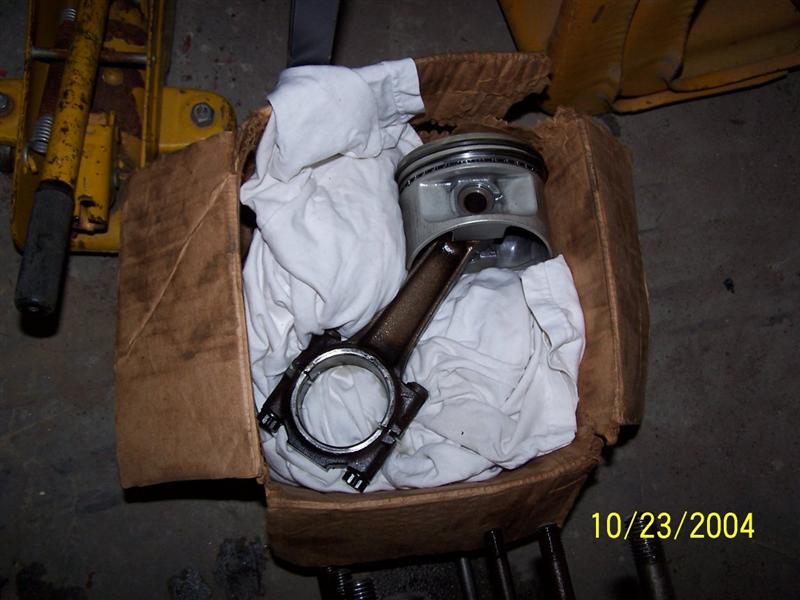
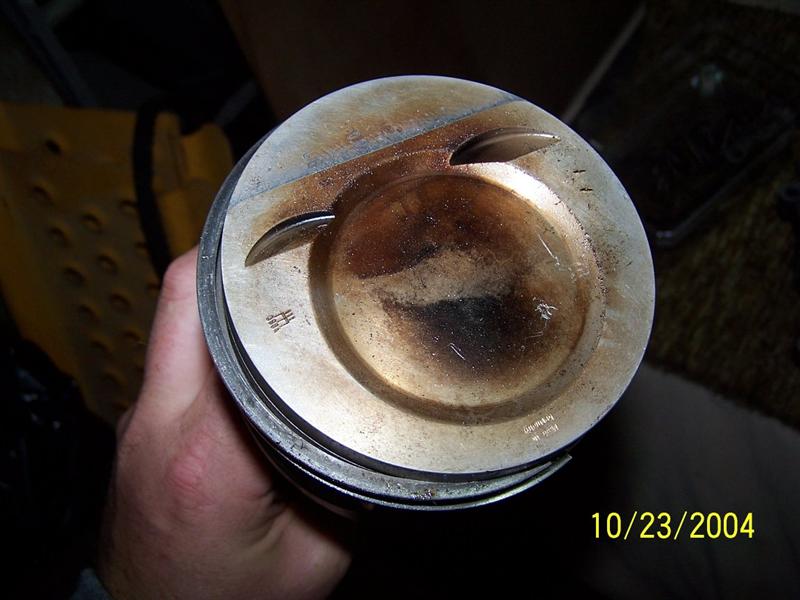
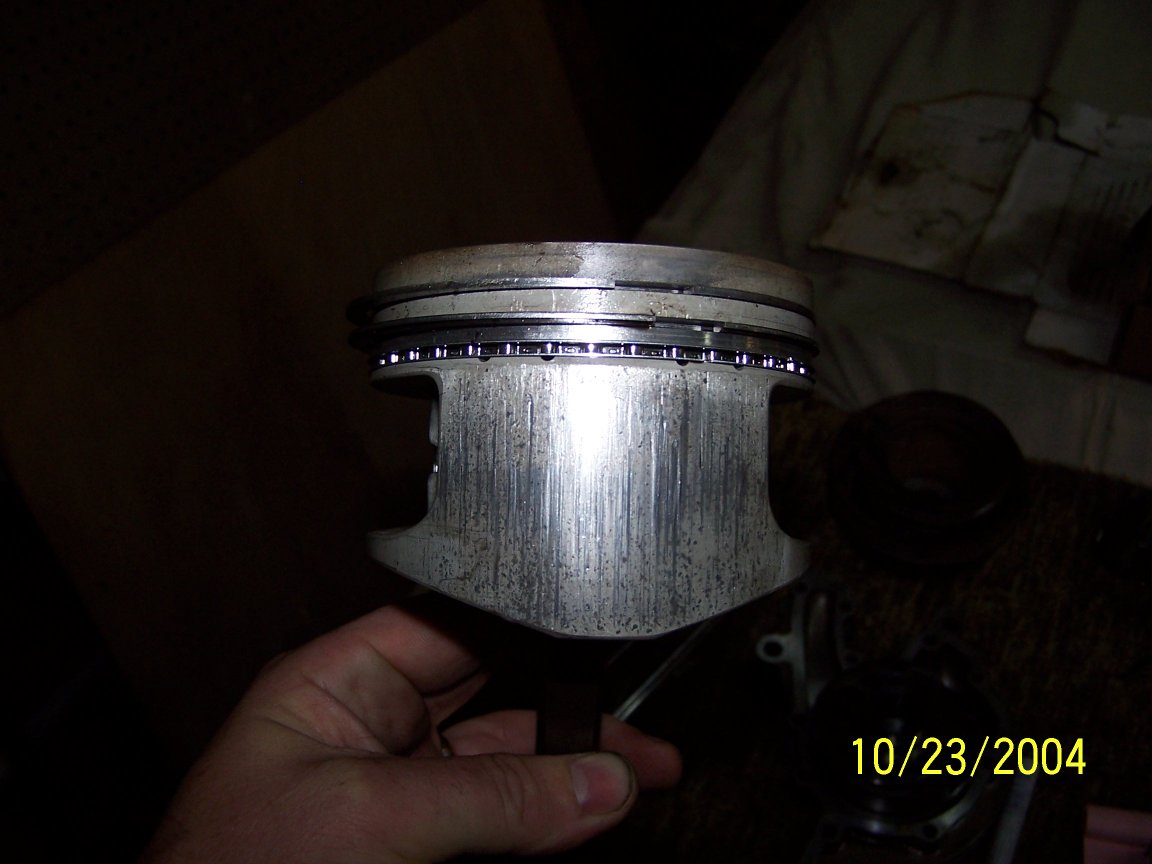
| A box of new pistons and rods. Well sort of. This is the set that come from my motor and as you can see they have been scored on the skirts. |
 |
 |
|
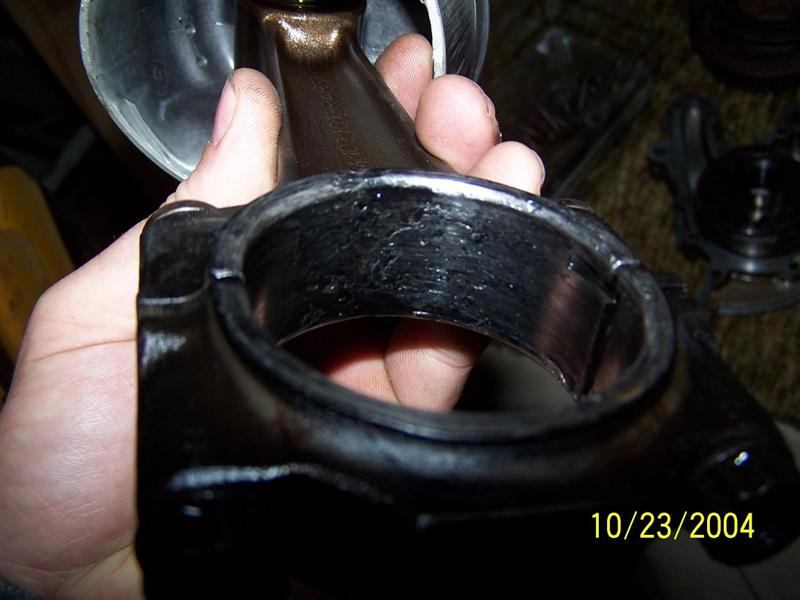
| My new pistons that have scored skirts and the #2 rod end that is battered and will need resizing and or replacement |
 |
 |
|
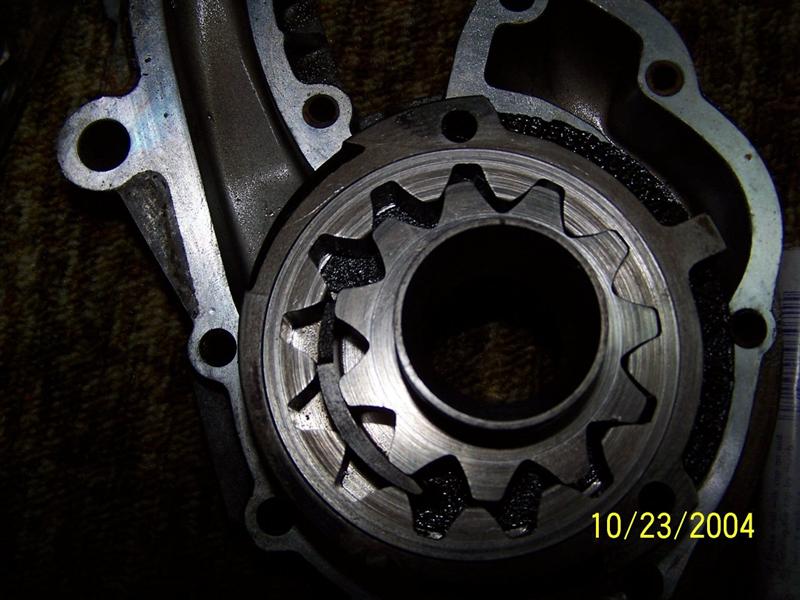
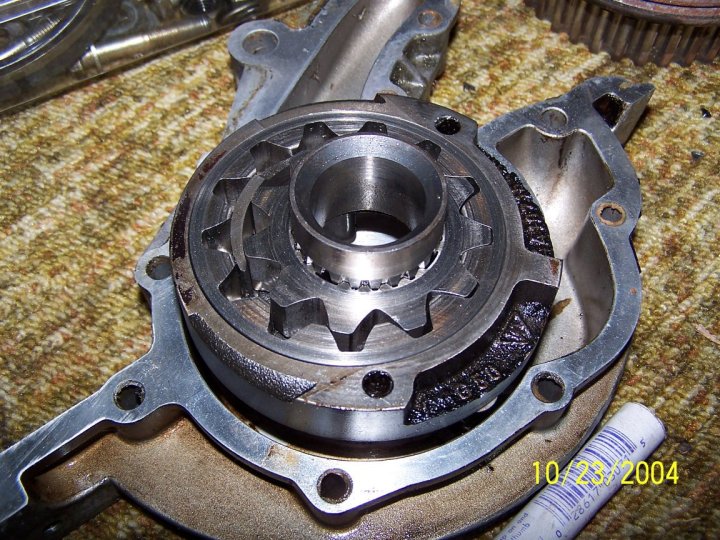
| Oil pump that is probably not usable there are some scratches on it. |
 |
 |
|
| Same with the housing the scratches are even worse here. |
 |
 |
|
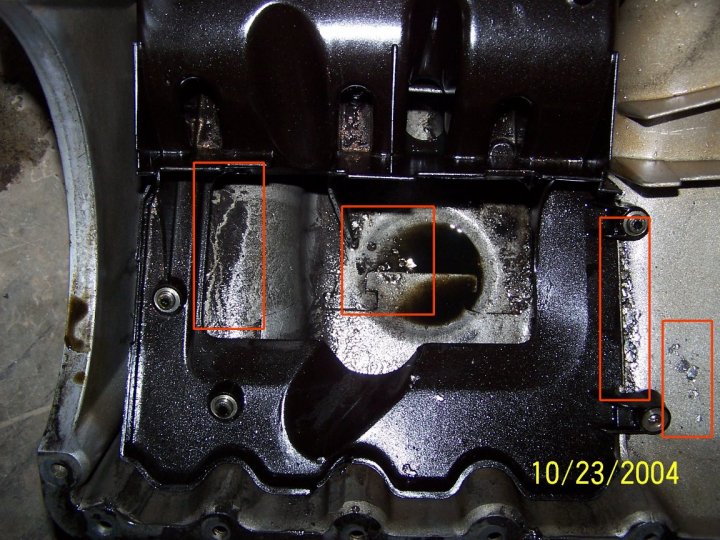
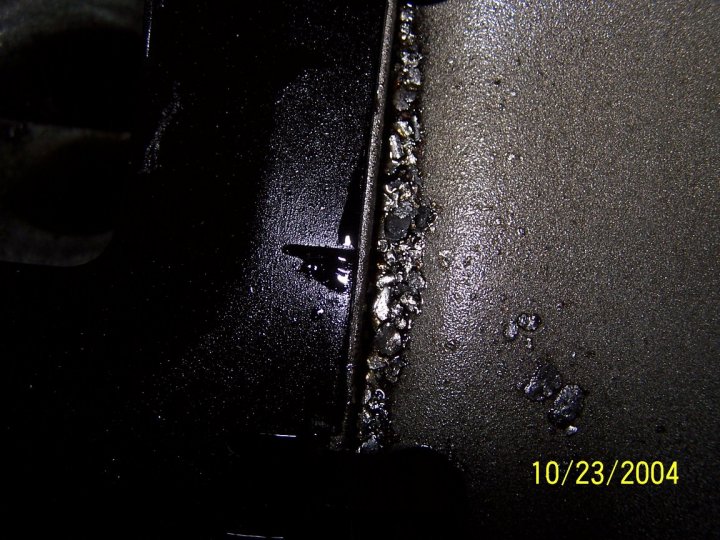
| The oil pan off the motor. The red box's show where the rest of the barring went to. |
 |
 |
 |
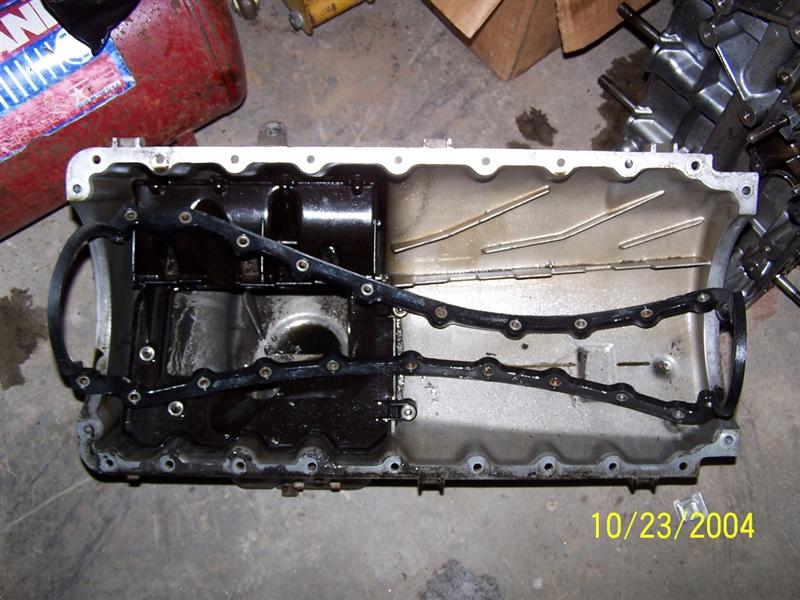
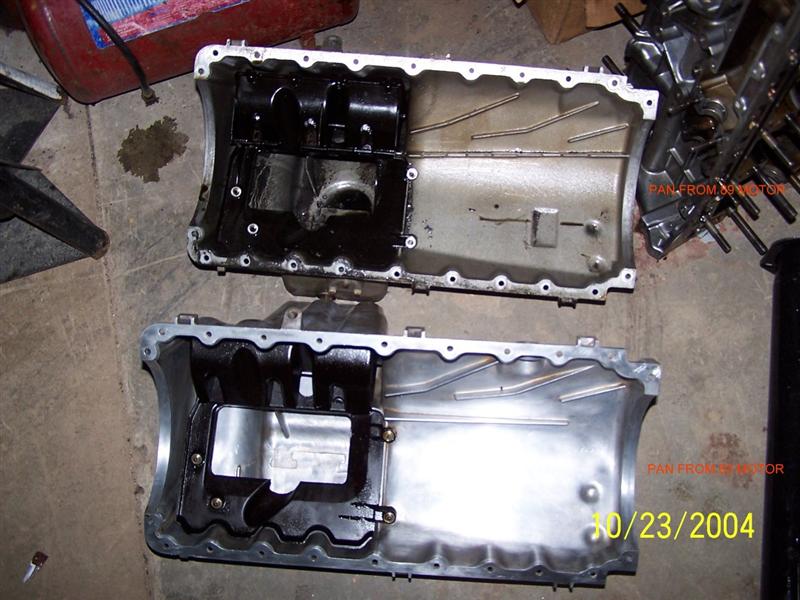
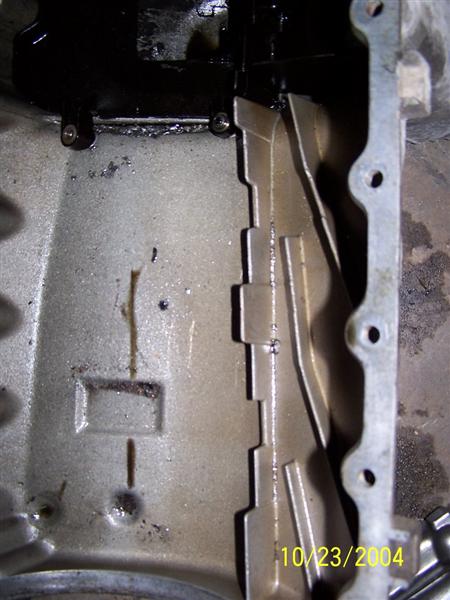
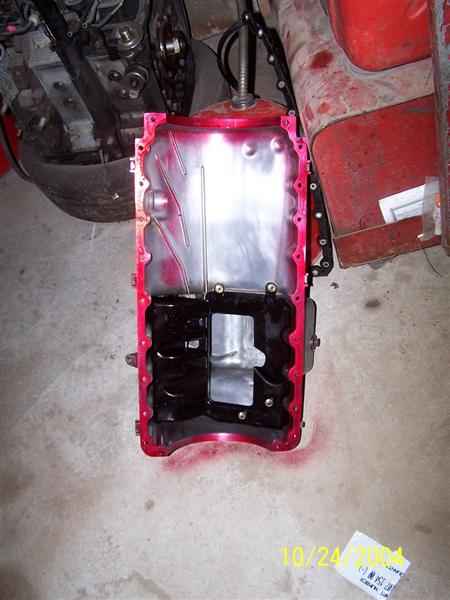
| An interesting look at the two oil pans. The top one is from the 89 motor and the bottom is from the motor I got from my friend. |
 |
||
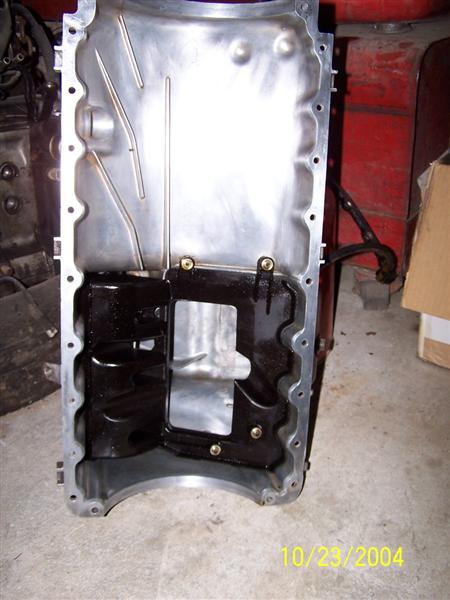
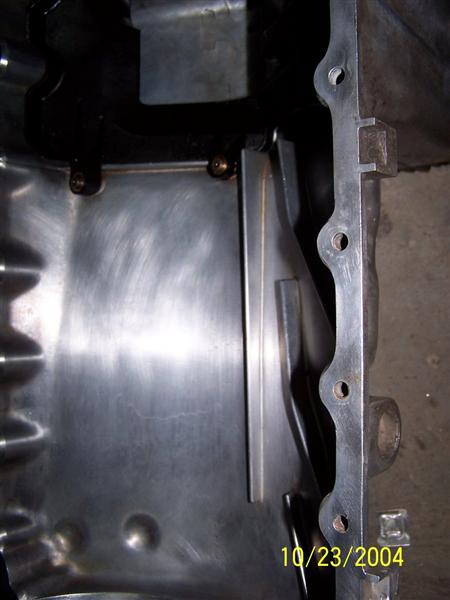
| Nice and clean. Look at the shine from that thing it is almost a mirror. |
 |
||
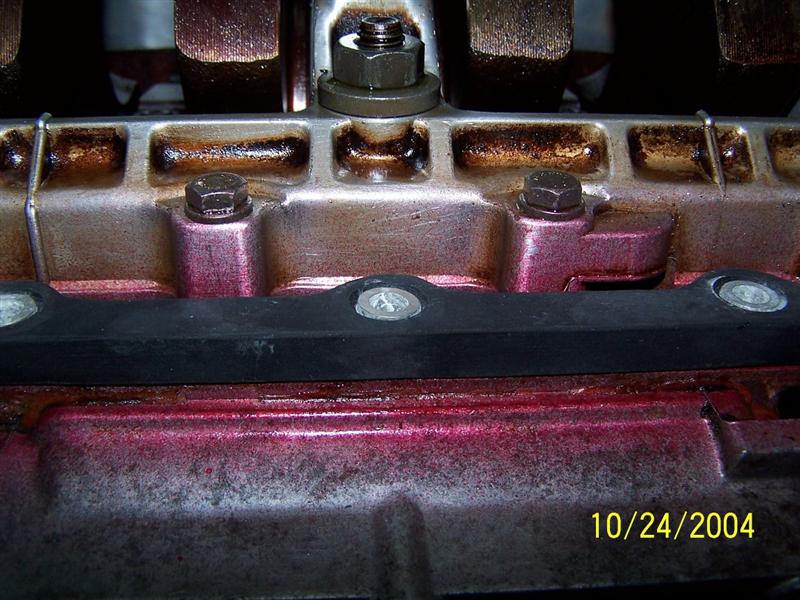
| This is interesting. Look at the two pans. the one on the left is from my 89 motor look at the rough surface on the casting and the notches in the wiper. The one on the right is smooth as glass and the wiper is shorter and strait. |
 |
 |
|
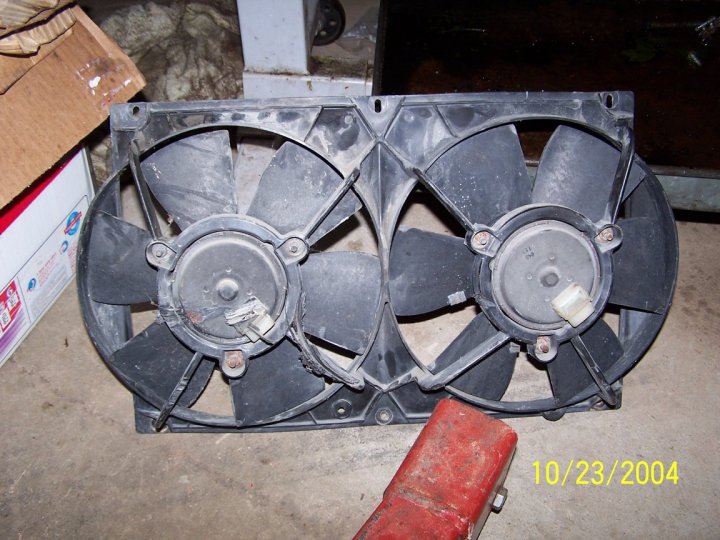
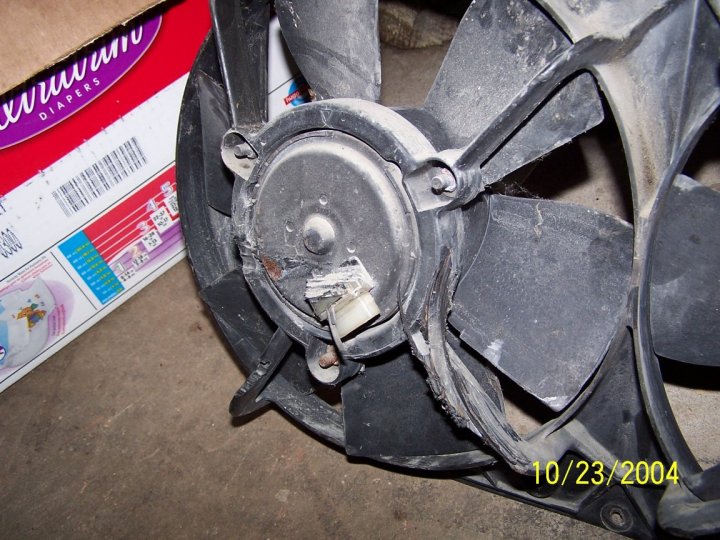
| The fan that killed the motor. You can see where it was pushed into the motor. |
 |
 |
|
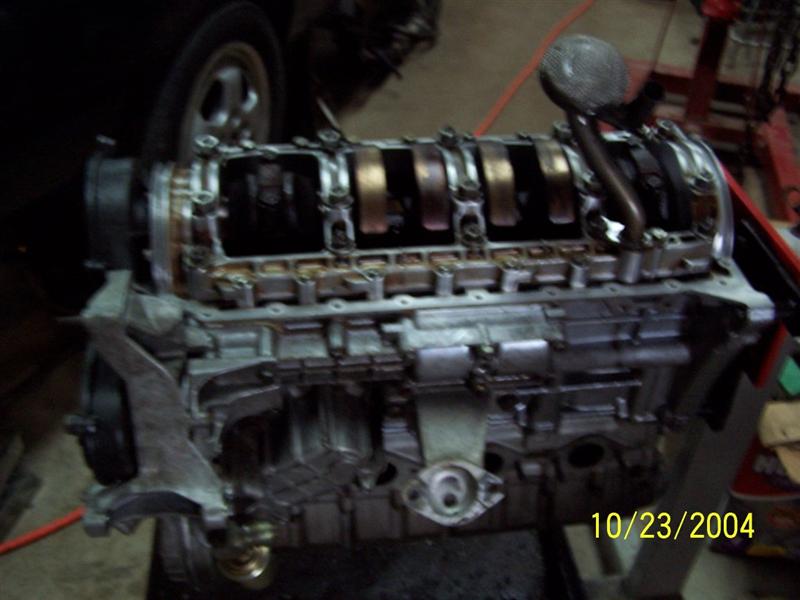
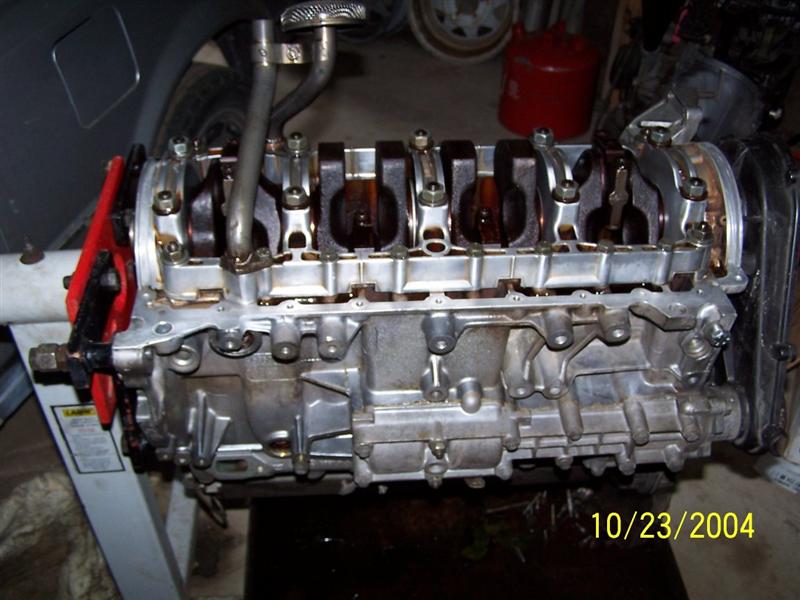
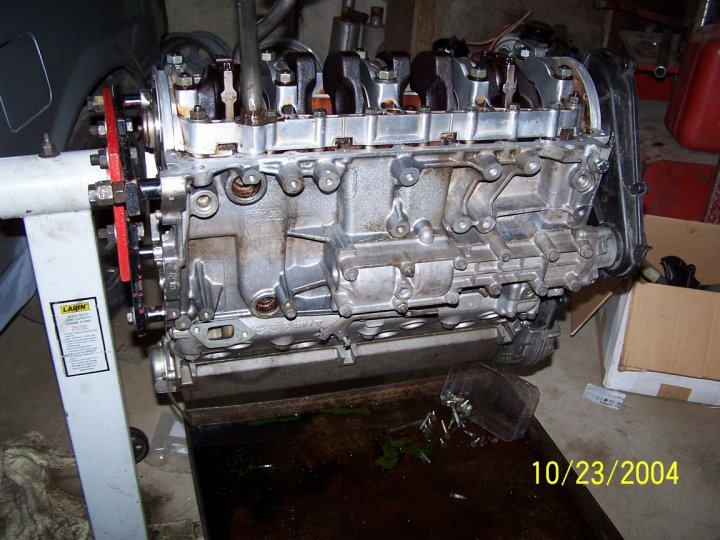
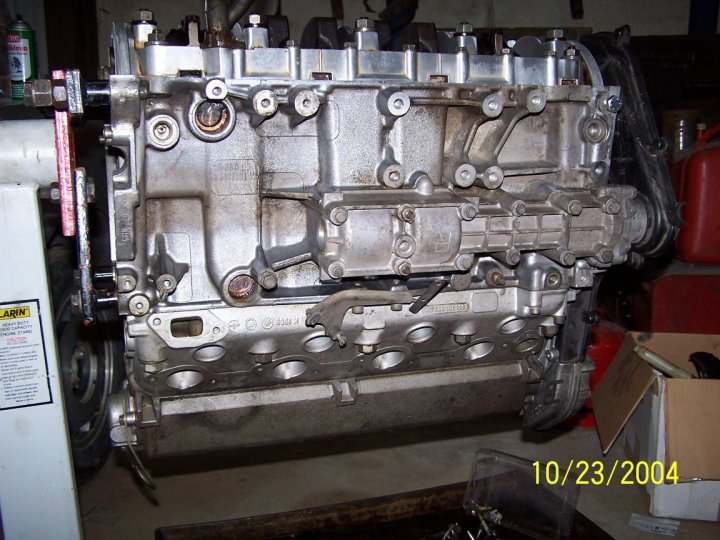
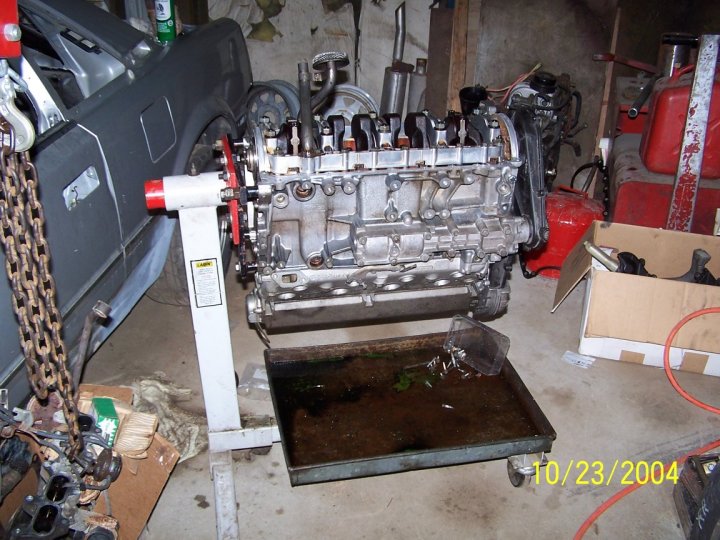
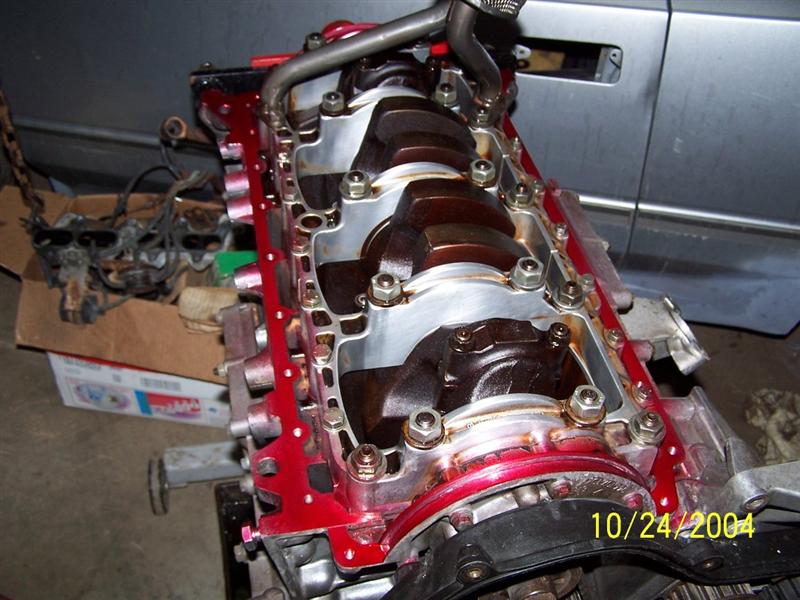
| The "new" motor. |
 |
 |
 |
 |
 |
 |
|
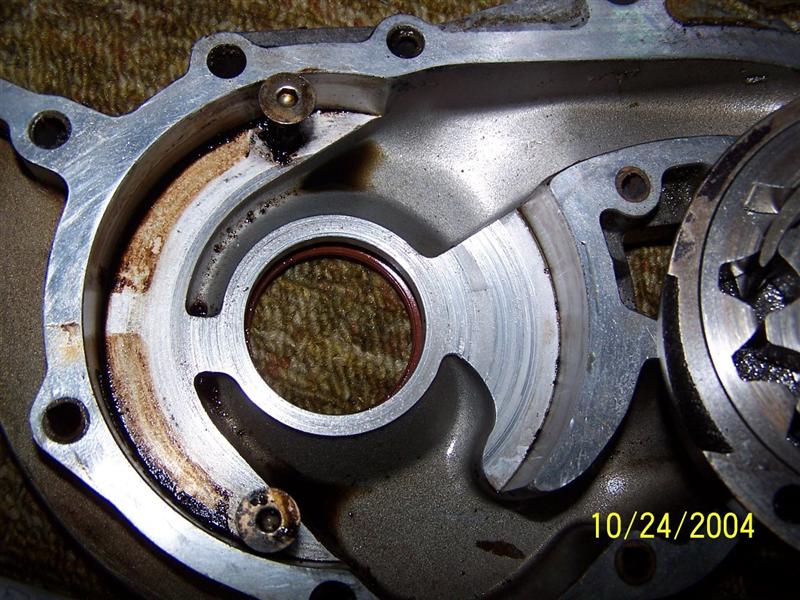
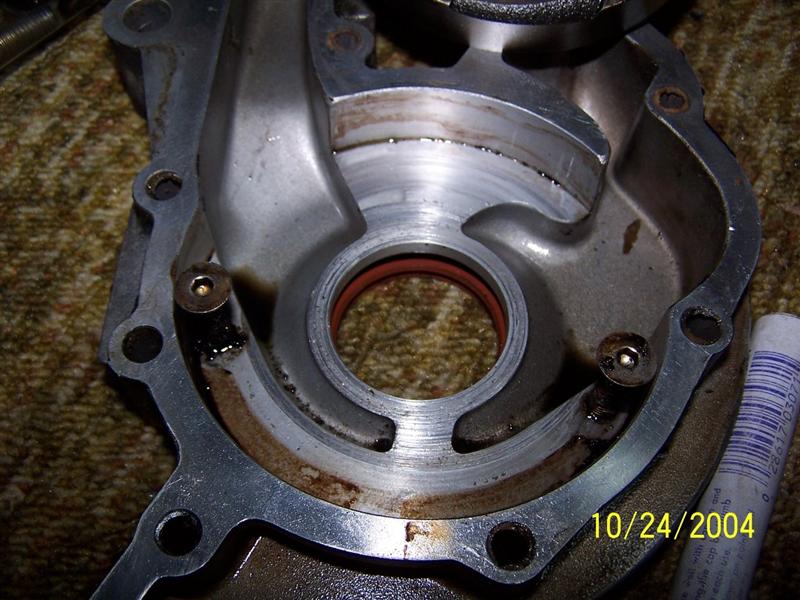
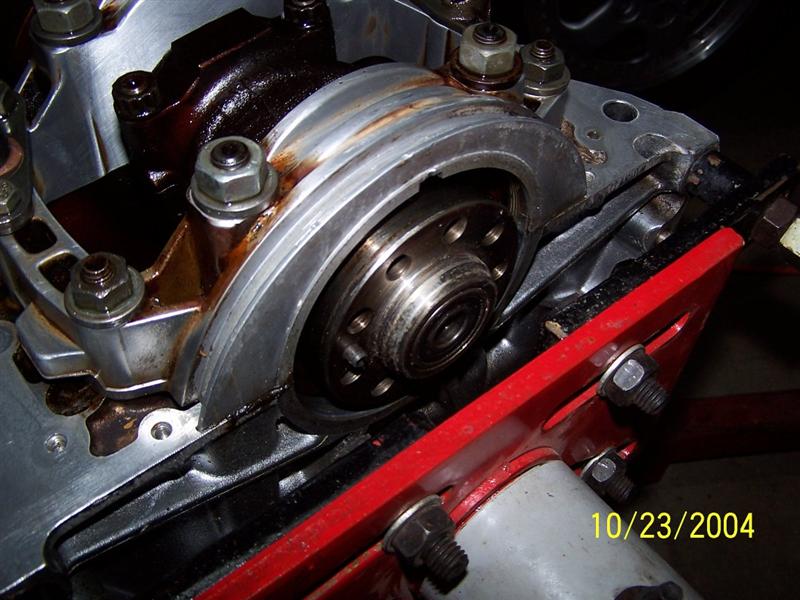
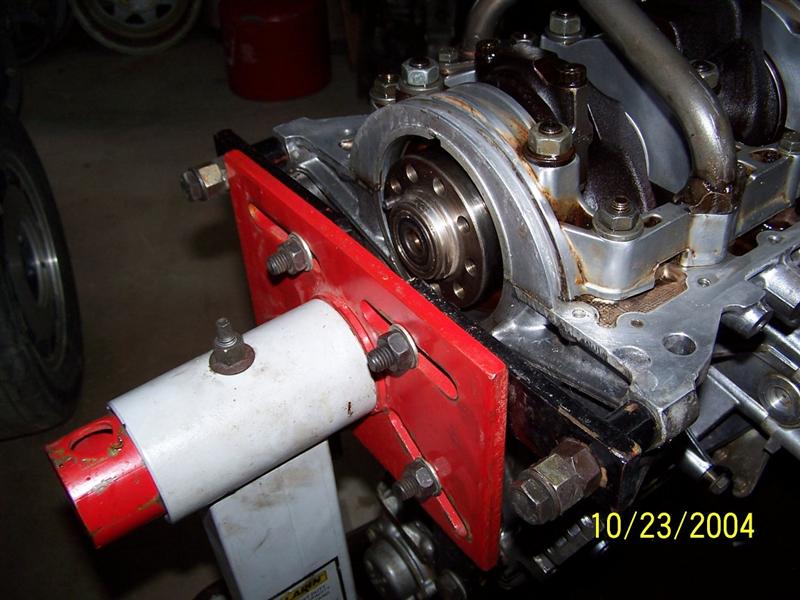
| The rear seal removed and ready for the new one. Cheep insurance that I will not have a leak even though it was said to only have 4 hours run time. I inspected the crank and there is no seal ware line at all. |
 |
 |
 |
| I use some high tack gasket adhesive here. You have to
let it dry completely otherwise the gasket will squish out when you
go to torque it the pan in place. The benefit is that I can
get the gasket aligned and set in tight at the corners. This
is really not necessary. In fact the manual does not use the
adhesive. I got in the habit of doing this when replacing pan
gaskets with the motor in the car. I holds the gasket in place
while you install the pan.
IF YOU ARE NOT FAMILIAR WITH THIS IT CAN CAUSE THE GASKET TO SLIP AND SQUEEZE OUT. ONLY DO IT IF YOU ARE COMFORTABLE WITH THIS PROCEDURE |
 |
 |
 |
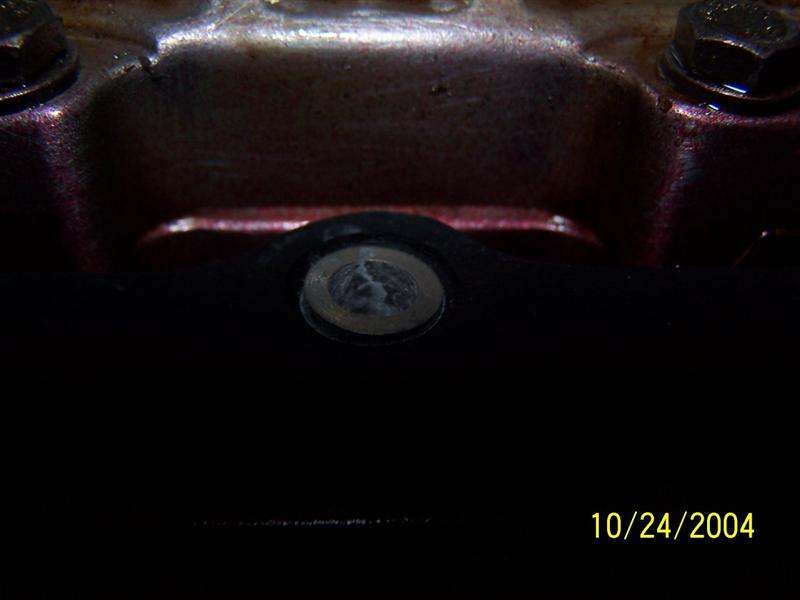
| A look at the compression limiters in the gasket. |
 |
 |
 |
| Fish eyes in the adhesive means there is grease / oil on the surface. It tells you just how good you cleaned the surfaces. |
 |
||
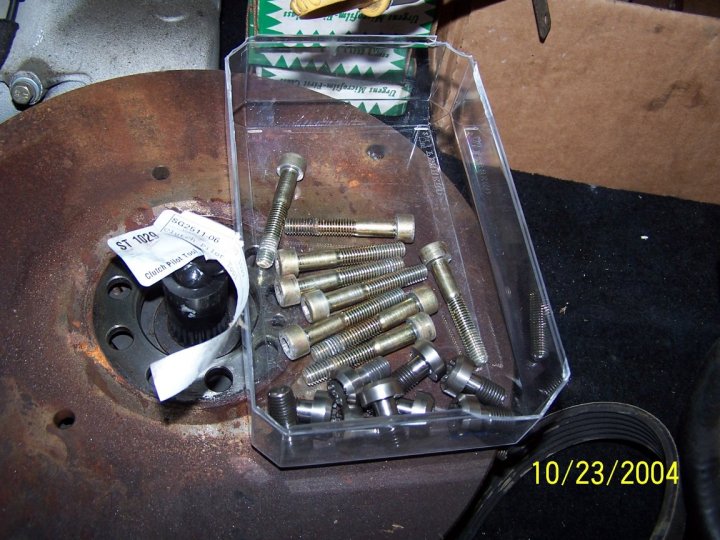
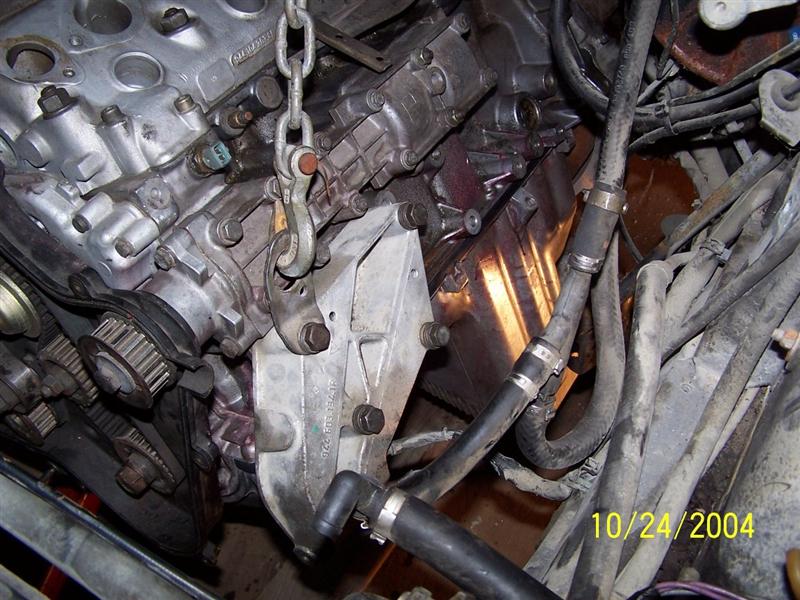
| THE MOTOR IS IN!!!!!!! You may notice that I don't have the cross member in place but the torque tube lined up perfect and slid in to place with ease. this brings up the use of Clutch alignment tools. I strongly recommend them it makes this part of the process so much easer. Also don't forget to grease the spines on the clutch as well as all the other surfaces you are supposed to put grease on when installing the clutch. Some time I should do a write up on "greasing" your clutch. |
 |
 |
 |
| Just a couple more shots. |
 |
 |
|
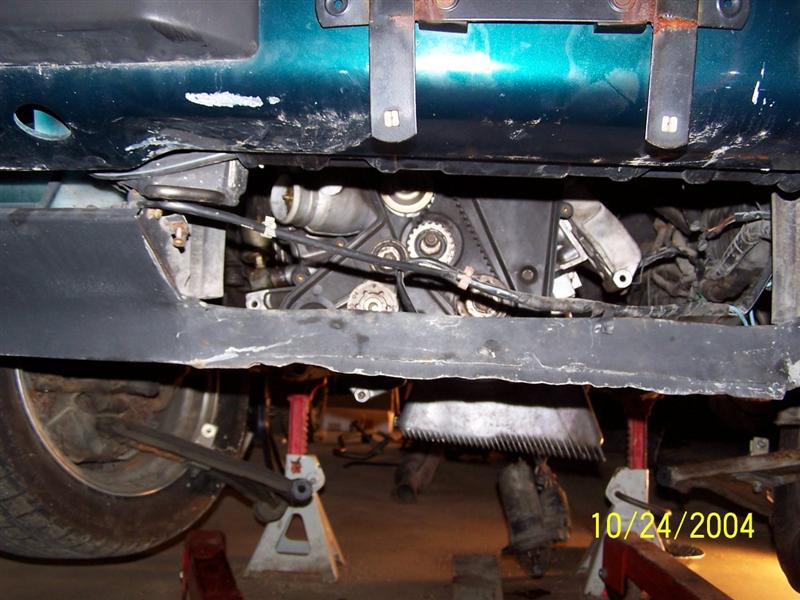
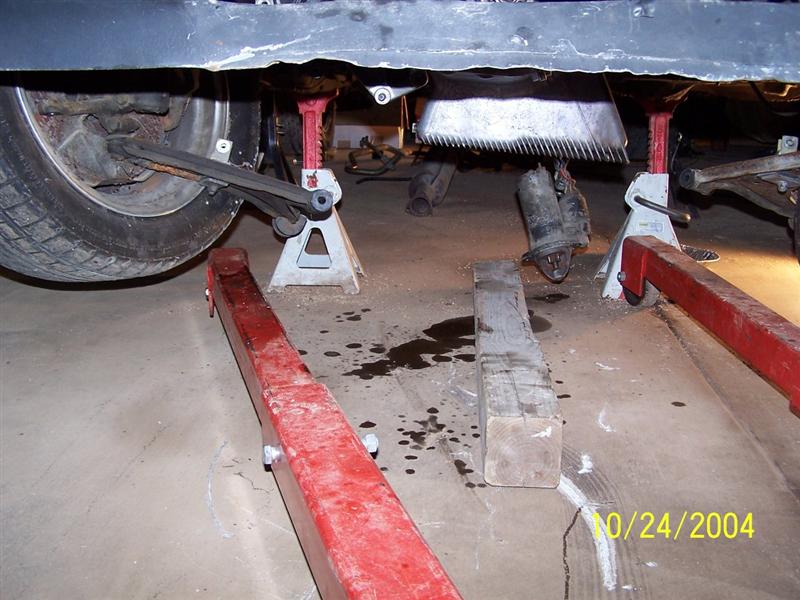
| And a couple more under the car. NOTE THE USE OF JACK STANDS Make sure that you use them.!!!!! |
 |
 |
|
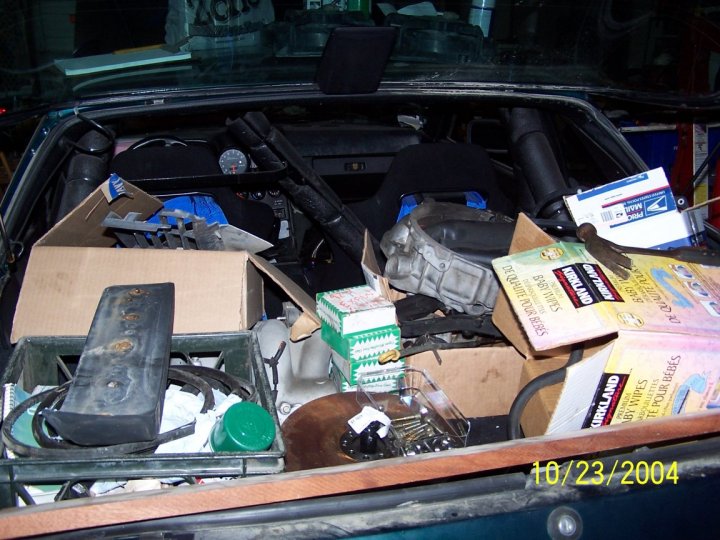
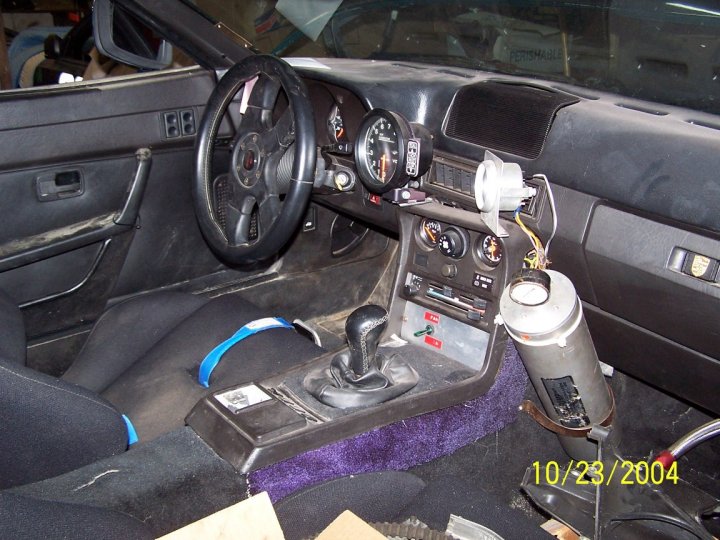
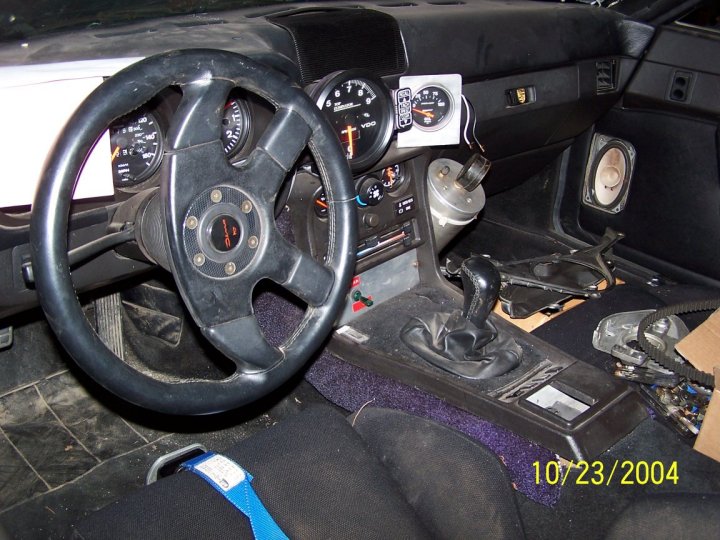
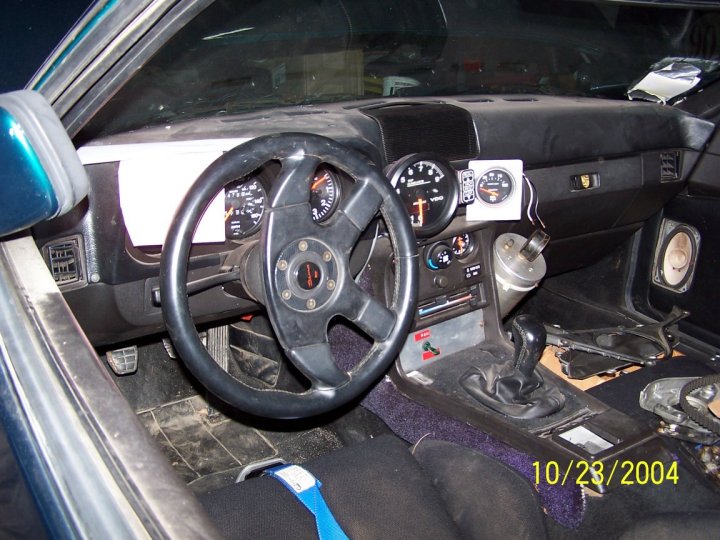
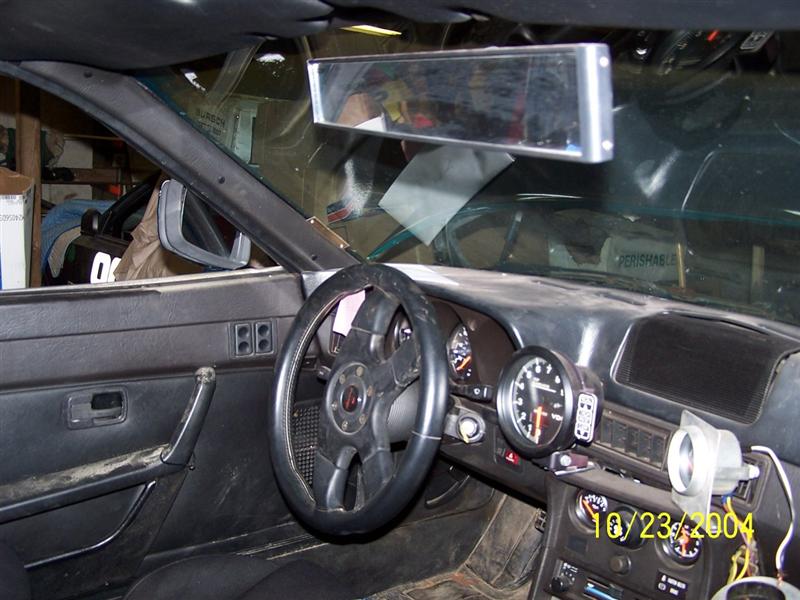
| Inside the car. You can see my VDO tack, Three oil
pressure gauges in total including the stock unit. Dino Wheel MOMO shifter handle with custom shortened lever. Accusump Wide angle mirror |
 |
 |
 |
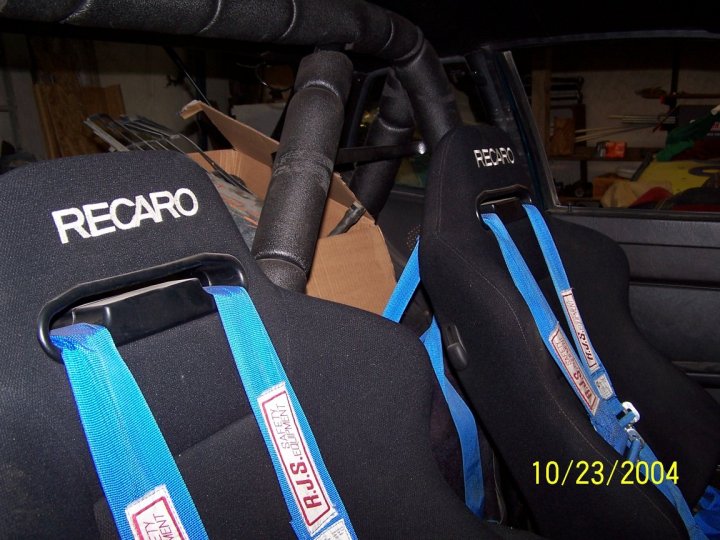
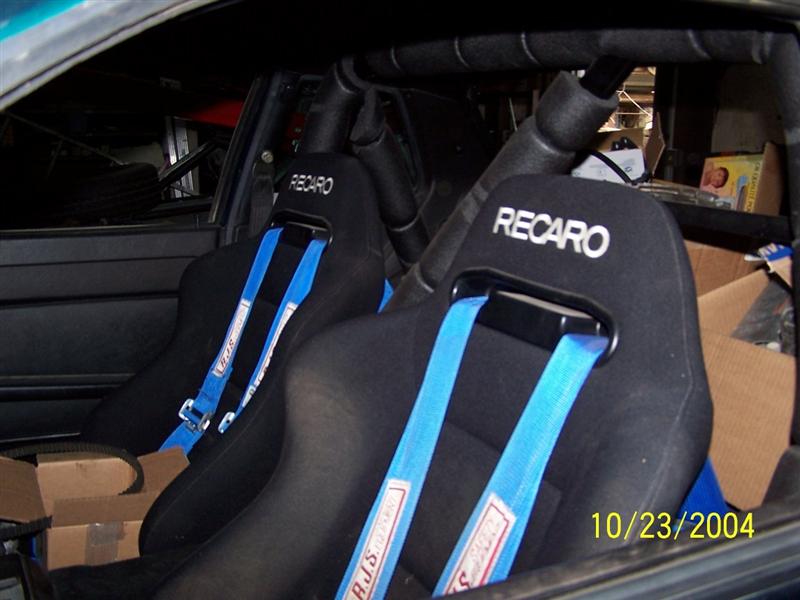
| Recaro seats and 5 points with cam lock. These are the
most comfortable seats I have ever used.
The padding on the roll bars is visible behind the seats. |
 |
 |
 |
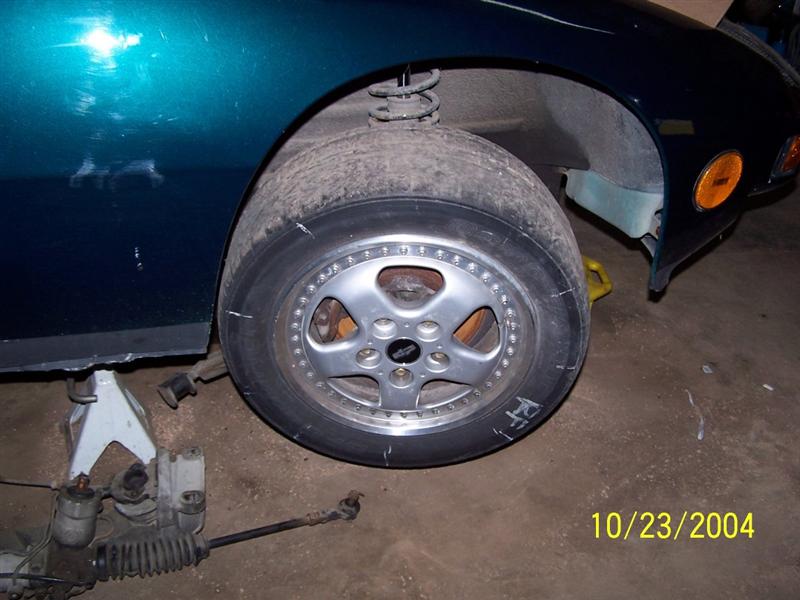
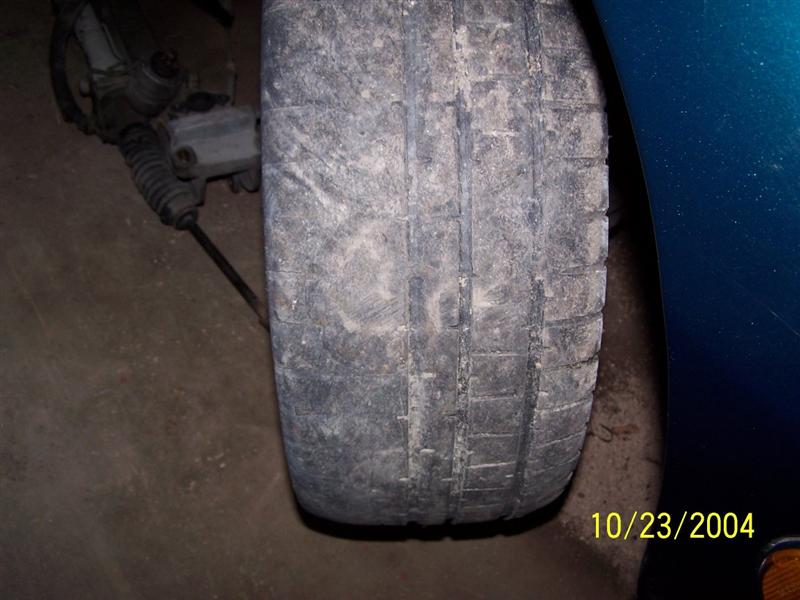
| DB wheels with R1's. Great tire on this car just not very forgiving. You have to get used to these as you can be going great and the next thing you know you rear wing is trying to pass you |
 |
 |
 |
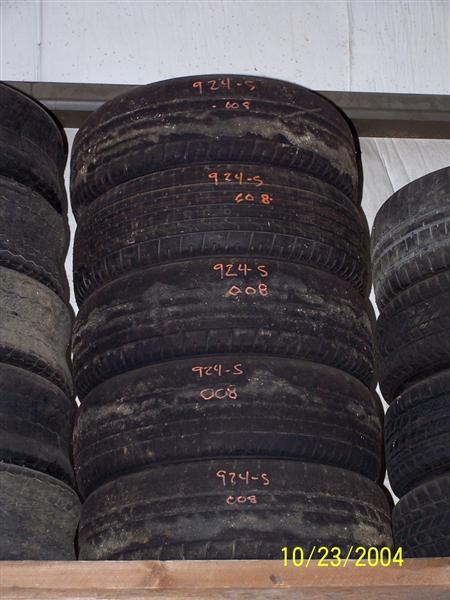
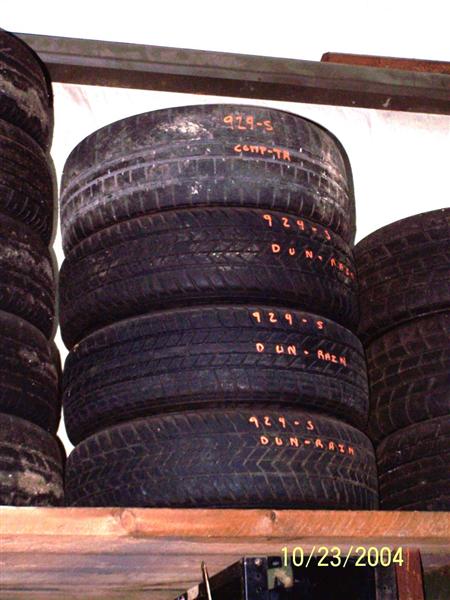
| OO8's on the left and a stack of d60m2's with one DB rim and
tire on the top. The 008's were my favorite tire. Very user friendly to bad these are probably hard as rocks. I have not got around to testing them. I should see about having them shaved. |
 |
 |
|
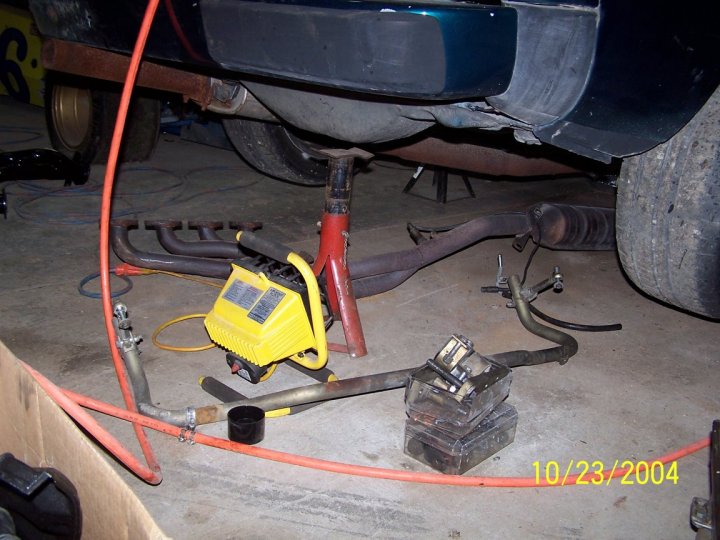
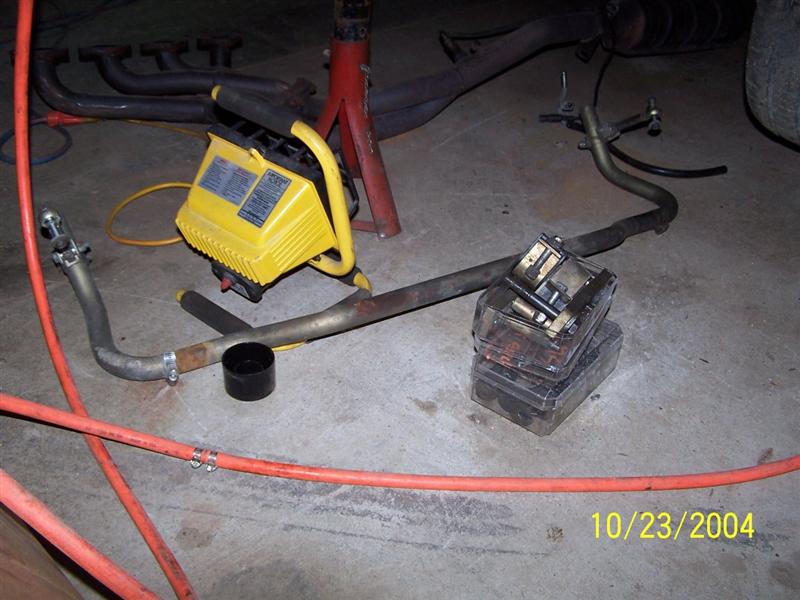
| Lets see..... You can see the stock exhaust in the background and the front sway bar in the foreground. It is a weltmister adjustable unit. I have them both front and rear. |
 |
 |
|
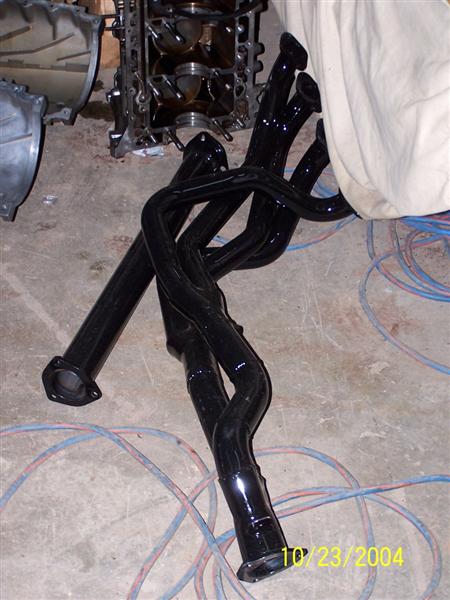
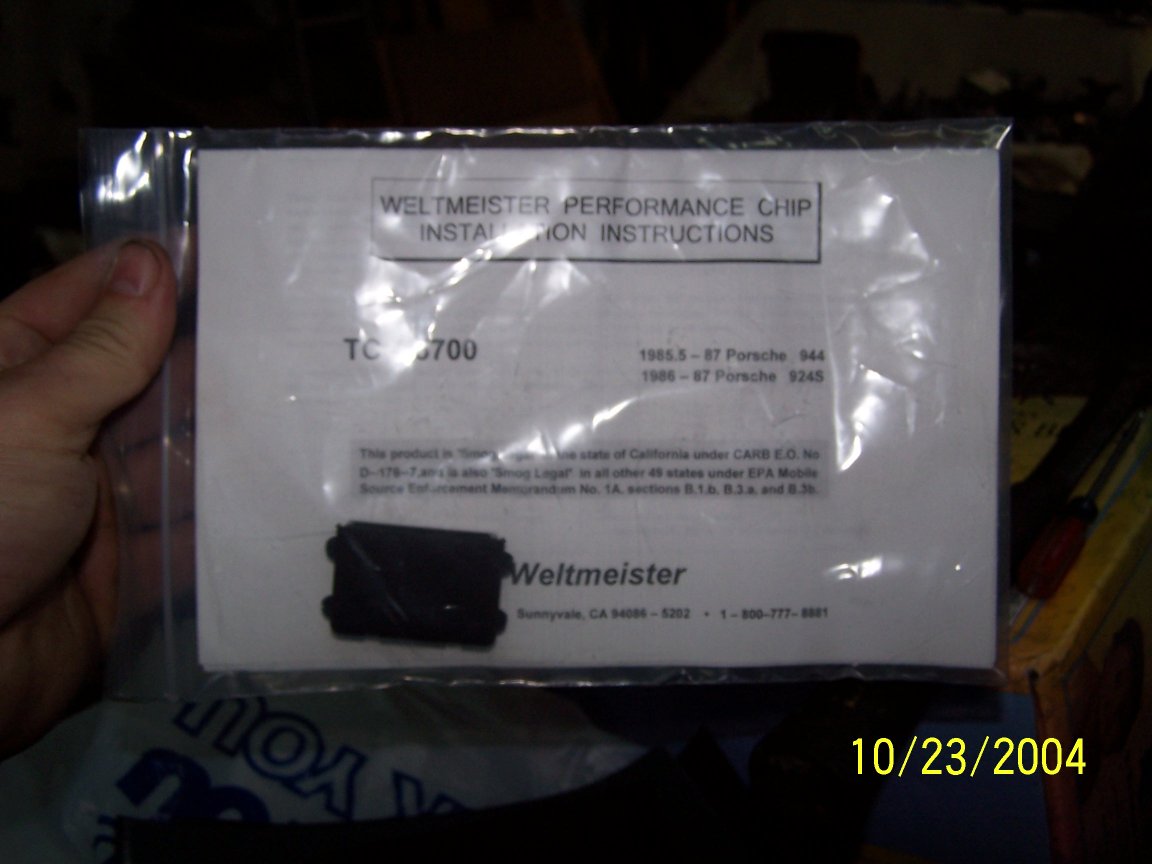
| New additions to the Party. I got a header and cat
replacement pipe and a weltmister chip. The reason I went with weltmister is that it is not as radical a tune as some of the other chips out there. I have had good luck with there other products so I am sticking with it. |
 |
 |
|
| Other things I am going to add is an MSD ignition box and a MSD coil. I am also considering a hybrid dry sump system. |