![]()
![]()
By: Dean Smith
Repairing of Loose or Imprecise Shifting
924s, 944 & 951
Use the information contained here in this document at your own risk.
How the shifter works.
Under the rubber and leather that you hold and that keeps water, sound and odors out of the cabin, is a piece of steel that is about 1 inch wide by about a ¼ inch thick and about a foot tall. It has a pivot ball on the bottom that is in a nylon bushing. The bushing is held in place by a oval steel plate that is mounted to the floor between the seats. The steel plate is oval shaped and is curved to match the shape of the hump in the floor between the front seats. On the side of the shift lever there is a 10 mm thick stub that is approximately 1 inch long. This stub goes through a hole in the end of a rod that runs back to the transmission. So when you move the shift lever it in turn moves the rod that runs back to the transmission and this rod then moves the levers on the transmission changing the gears.
So what goes wrong?
The stub that sticks out of the side of the shift lever, that is under the leather and rubber boots, wares. This ware causes excess play in the connection between the shift lever and the shift rod
What are the symptoms?
You will know if your shifter is in need of repair by the feel. The symptoms are.
1. You have to push the shift lever all the way to the extreme left or right of the shift pattern to get in to either 1st or 5th gear. Problems getting in to 5th gear and reverse gear tend to be the first problem but eventually 1st and 2nd gear will become a problem.
2. You will also have a lot of play in the shift lever. It is often difficult to tell if you are in gear or neutral as the side to side play is so extreme.
Note: There should be a total of 1/8” or less of side to side play in the shift lever that is in good shape / functioning properly.
3. Sloppy or imprecise feeling when you shift gears.
Note: This “slop” can lead to missed shifts. A missed shift at the wrong time can lead to very bad things.
4. If you let it go like I did the circlip will come off and the shift lever will come partially disconnected from the shift rod that runs to the transmission. This results in you only having 3rd and 4th gears.
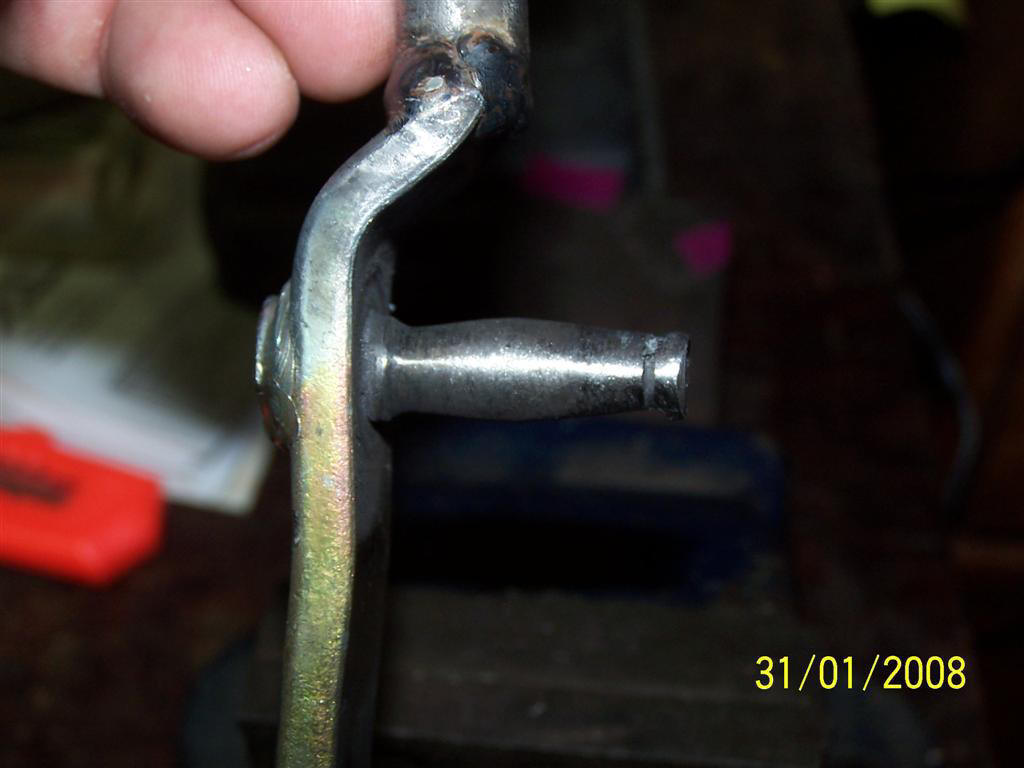
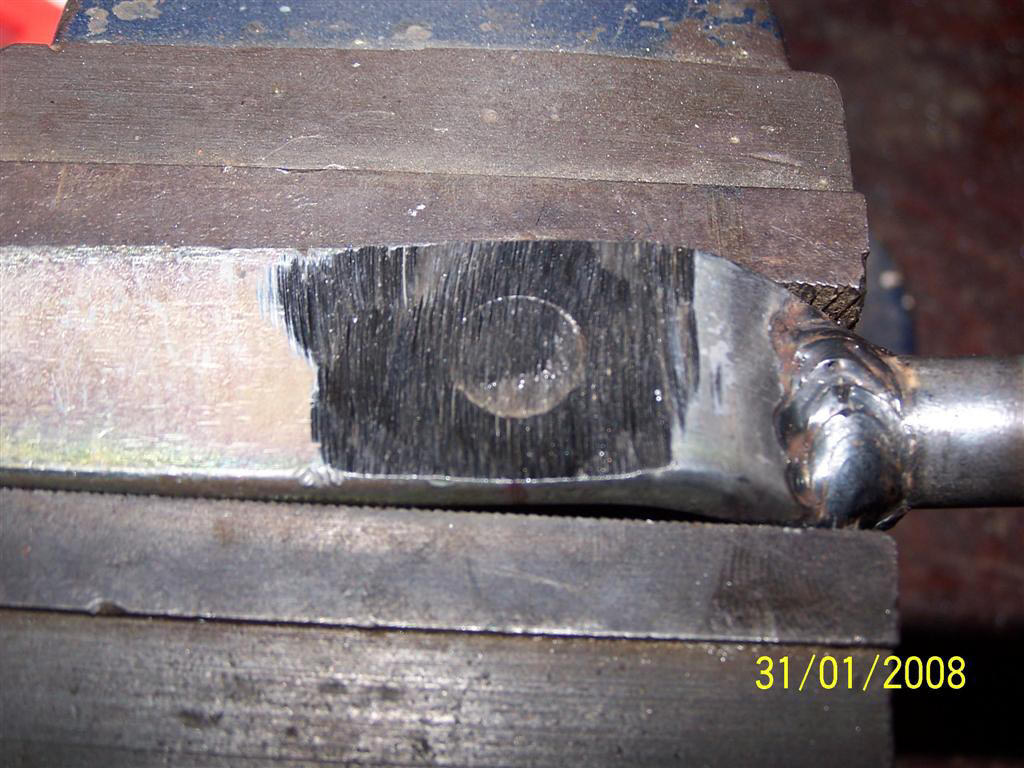
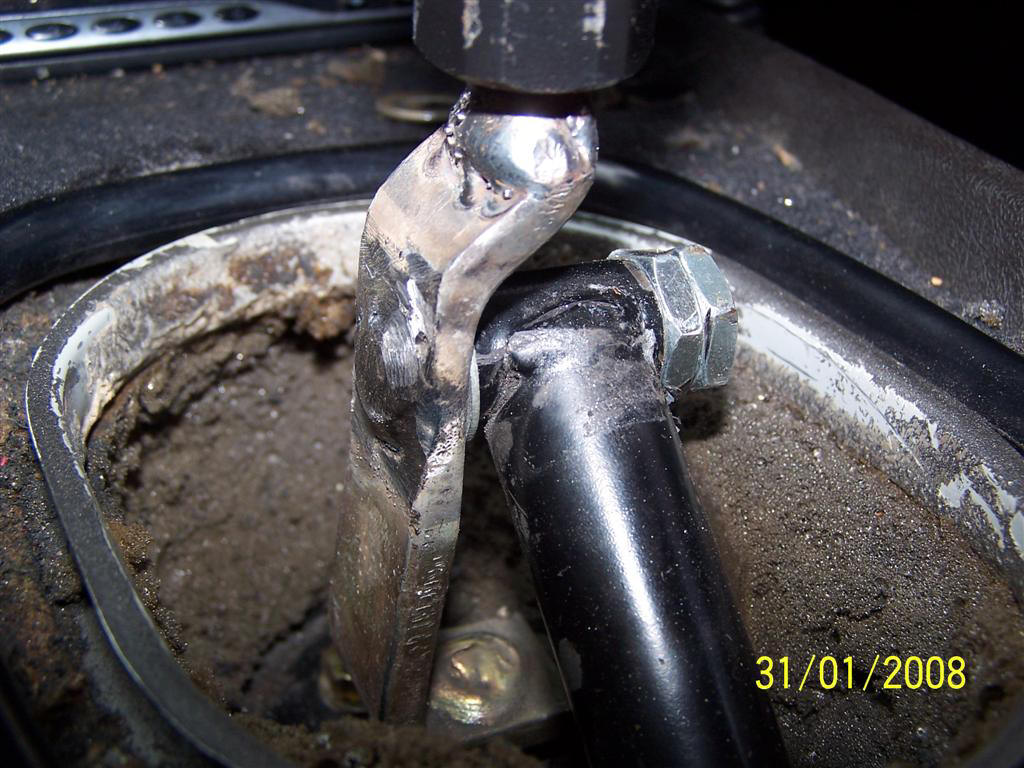
This is the stub on my shift lever. Note that it is narrow close to the lever and again out at the end. It almost has a barrel shape to it. This one is warn so bad that the circlip that is supposed to hold things together was completely missing. If you look closely you can just make out the slot that the clip used to be in at the end of the stub.
You should also note that my shifter is a bit different than a standard shifter. I have removed the top portion of it that would normally hold the stock knob and replaced it with a bolt sized to accept a custom shift knob. This will make my shifter look a little different from the OEM unit but the part that we are dealing with is part of the OEM shifter and should look the same on yours.
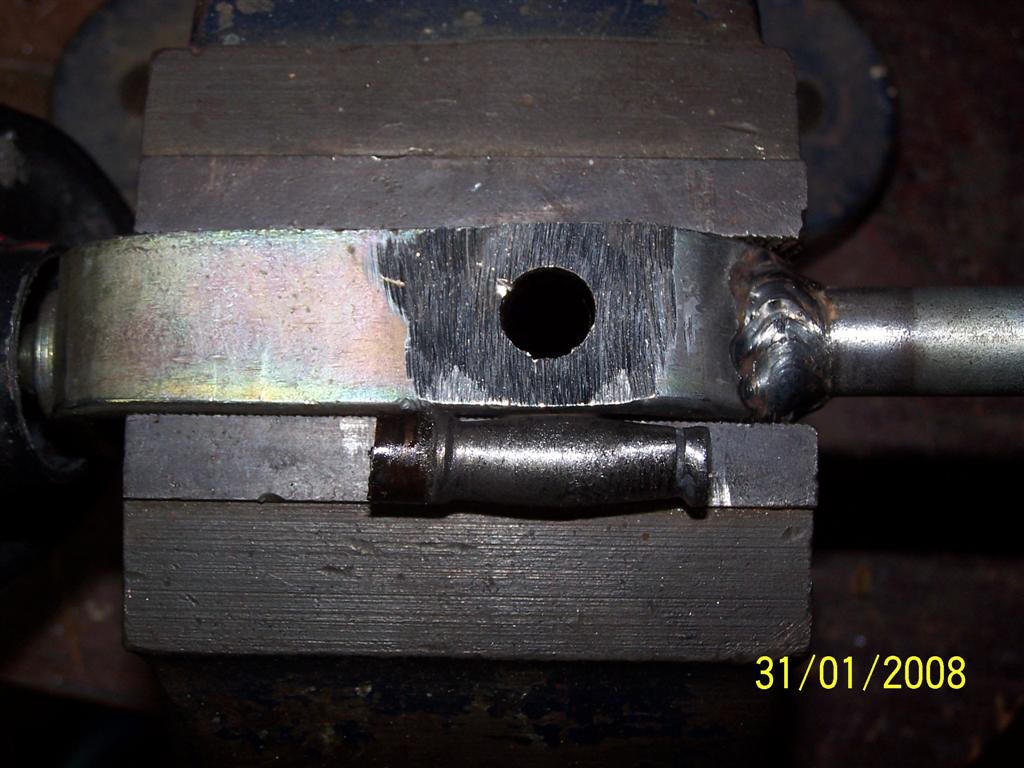
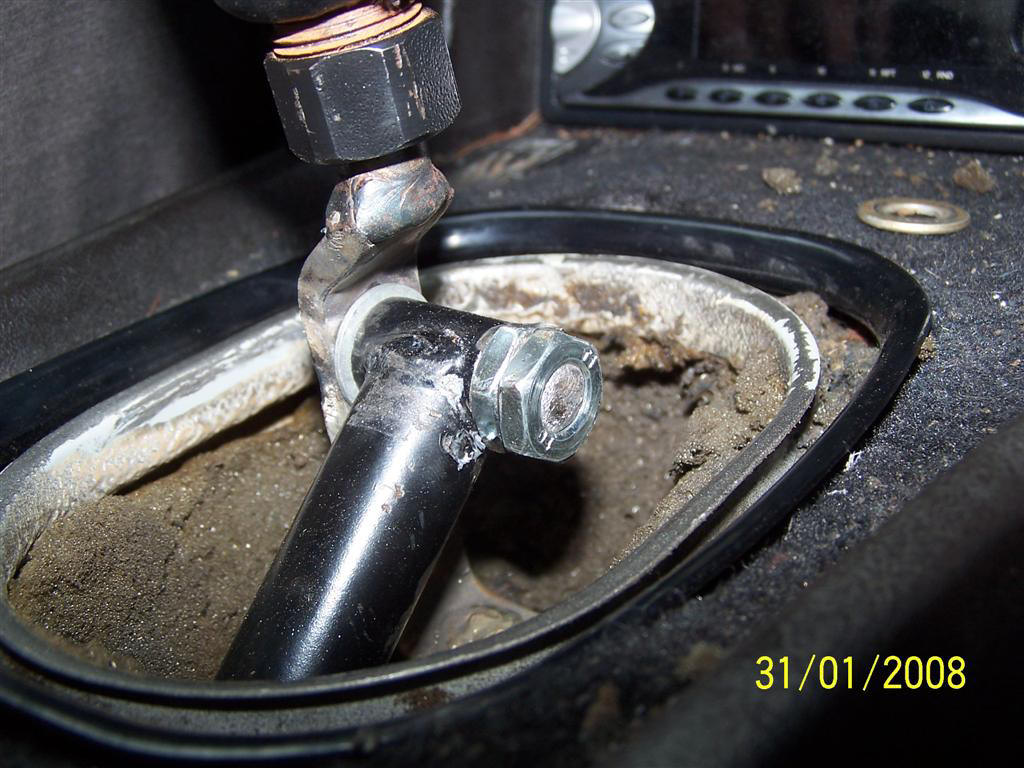
Here is another look at the shifter. The bottom is to the left.
There are two fixes.
1. Get a new shifter. These run on average between $40-$70 shipped depending on where you get them and what is included. Add in overnight shipping and it can be close to $55- $100. Most places you only get the shift lever. Others supply you with a new bushing for the floor mount as well as a new spring washer and circlip. The bottom line is make sure of what you are getting. The cheapest may not be the best deal
2. Fix the one you have. Cost me $3.84 in parts including tax. Since I am cheep and I don’t want to wait for a new one to be shipped and my shifter fell apart making my car virtually un-drivable and I wanted it fixed today. I am going to show you how I refurbished my shift lever. Did I mention I am cheep?
Tools:
Welder – I have a Lincoln 135amp 110 volt Flux core MIG.
Grinder – I have a 3” Makita with metal cut off blade but you could use a drill and a grinding disk.
Pliers - To grab hot things.
3/8-12MM socket with extensions
2-17MM wrenches. A crescent can be used to replace one of the 17MM if you don’t have two.
Hammer
Steel Punch
Duct tape (I like the black “Gorilla duct-tape” from the makers of “Gorilla Glue”)
Metal File
Consumables
Locktite
High Temp Bearing Grease
Parts:
1 - 10mm spring washer (M-10)
1 – 10mm x 175mm x 1.5 thread pitch (M10x175) standard steel bolt
(Note: You don’t want to use a specially hardened bolt as it will over time ware out the shifter rod. Since it is much easier to replace this stub than the shifter rod you want to keep the part that wares on the shift lever)
1 – 10mm standard washer
2 – Jamb nuts 10mm x 1.5.
(Note: Standard bolts will not work as they are to thick. Jamb nuts are half the thickness of a standard nut allowing you to fit them in the place of a single standard nut.)
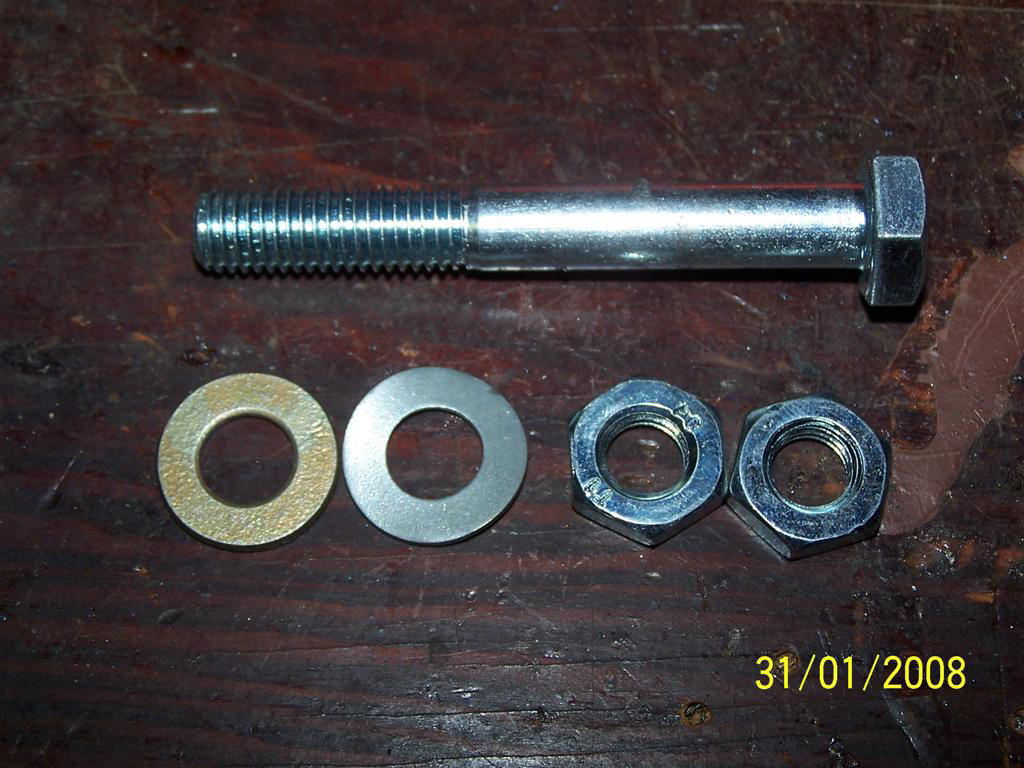
Top is your bolt. From left to right. Washer, spring washer and two jamb nuts.
Start off by removing the shift knob, rubber and leather boots from the shift lever. (See your manual for this). This is very important as they could be damaged later on during the repair. Remove the shift lever from the car. Again reference your manual for this. I like to put the car in either 2nd or 4th gear and then remove circlip from the end of the stub and separate the shift lever from the rod. This allows you to move the lever out of the way so you can better access the two bolts holding the lever to the floor. The two bolts are about an inch in front of and an inch behind the ball mount of the shift lever. They will be hidden under the foam rubber. You can see the holes for the two bolts in the metal plate in the photo below. Unscrew them with a 12mm socket and extensions and remove the shift lever.
With the shift lever removed take a 3” long piece of duct tape and tear it length wise so to match the width of the tube on the end of the shift rod. Set this aside for later.
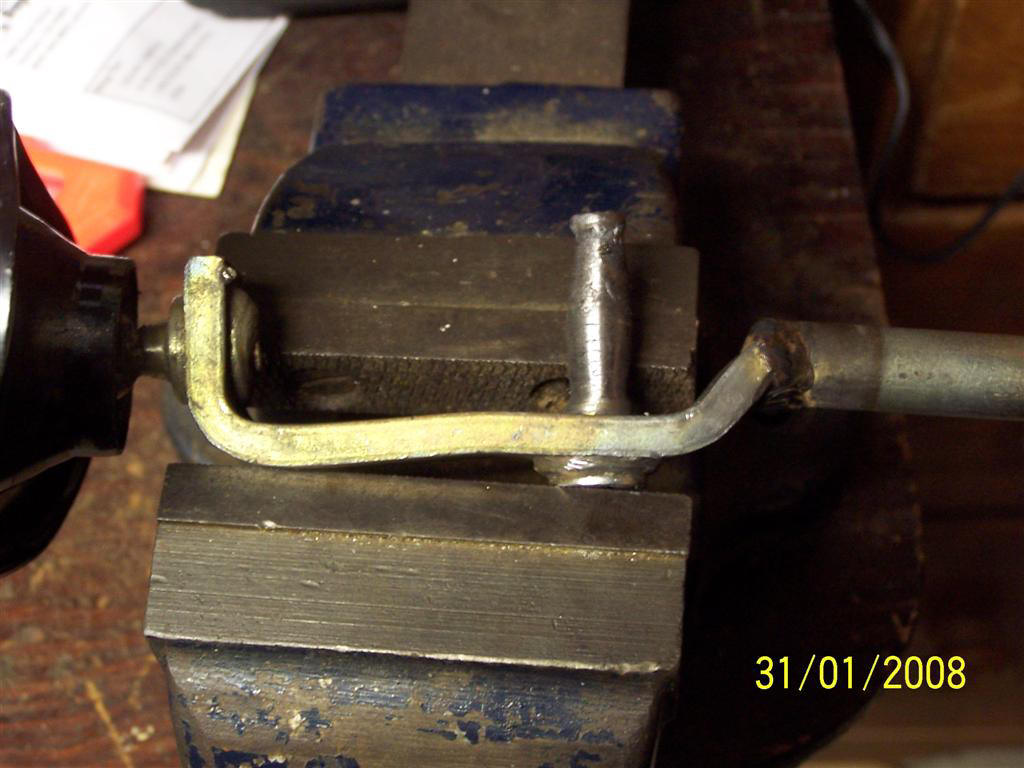
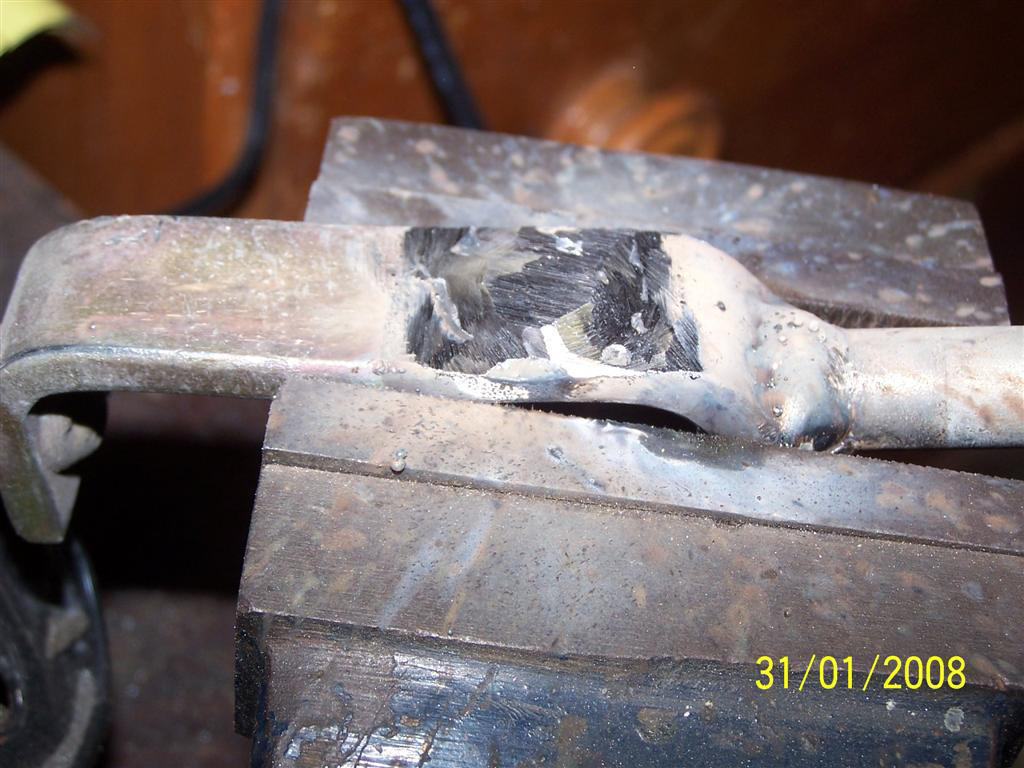
Once you have the shift lever removed place in a vice as shown above with the stub facing down so you are looking at the back of the stub that is welded to the shift lever. This weld has to be ground down/off, completely removing it.
This is what you will see once you grind off the weld. Note the circle in the middle. Take the hammer and punch and gently tap the center of the circle removing the stub from the shift lever. This is best done while things are still hot.
This is what you will get once the stub has been removed from the shift lever. This really shows how much the stub had worn.
In the photo above I have repositioned the shift lever so it is vertical in the vice. Be carful not to burn your self as the shift lever will be hot. Put the bolt through the hole in the lever and then put the piece of duct tape, you sliced to match the shift rods width, on the bolt as shown above. You want the duct tape to be aligned with where the threads start on the shaft of the bolt. The reason for this is if you have threads inside the tube on the end of the shift rod it will ware faster making the repair ware out much faster. With the tape in place push the bolt over as shown making sure it is square to the shift lever. Take your welder and tack the bolt in place on the side of the lever where the head of the bolt is. Then remove the tape as it will catch fire when you complete the weld.
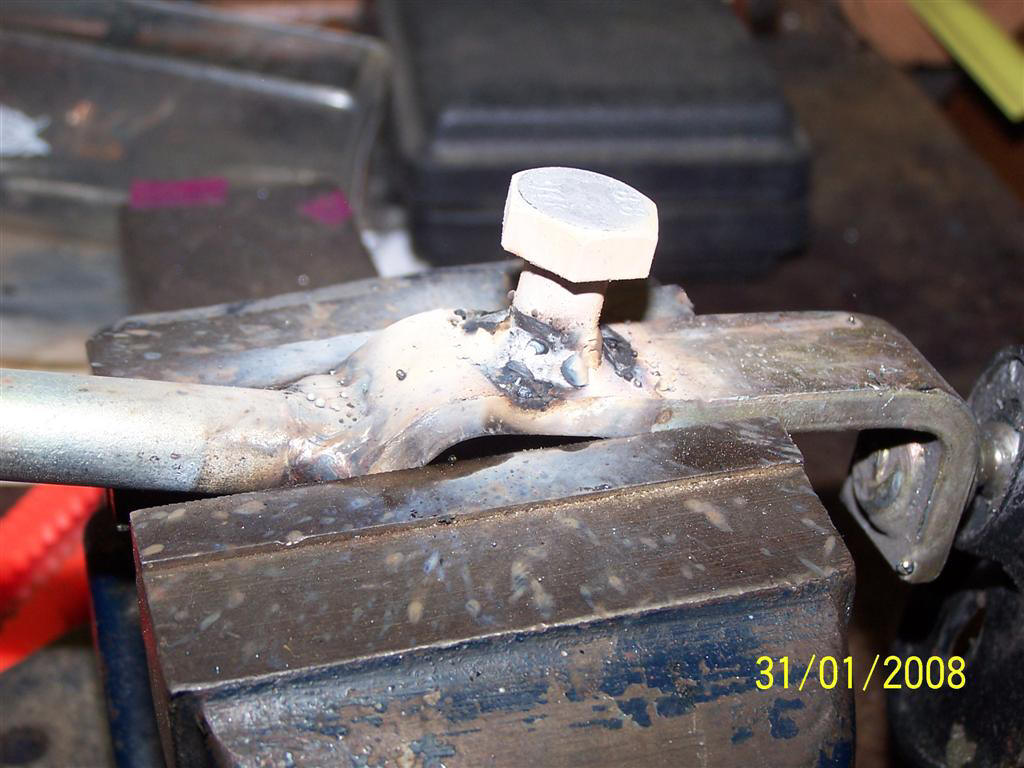
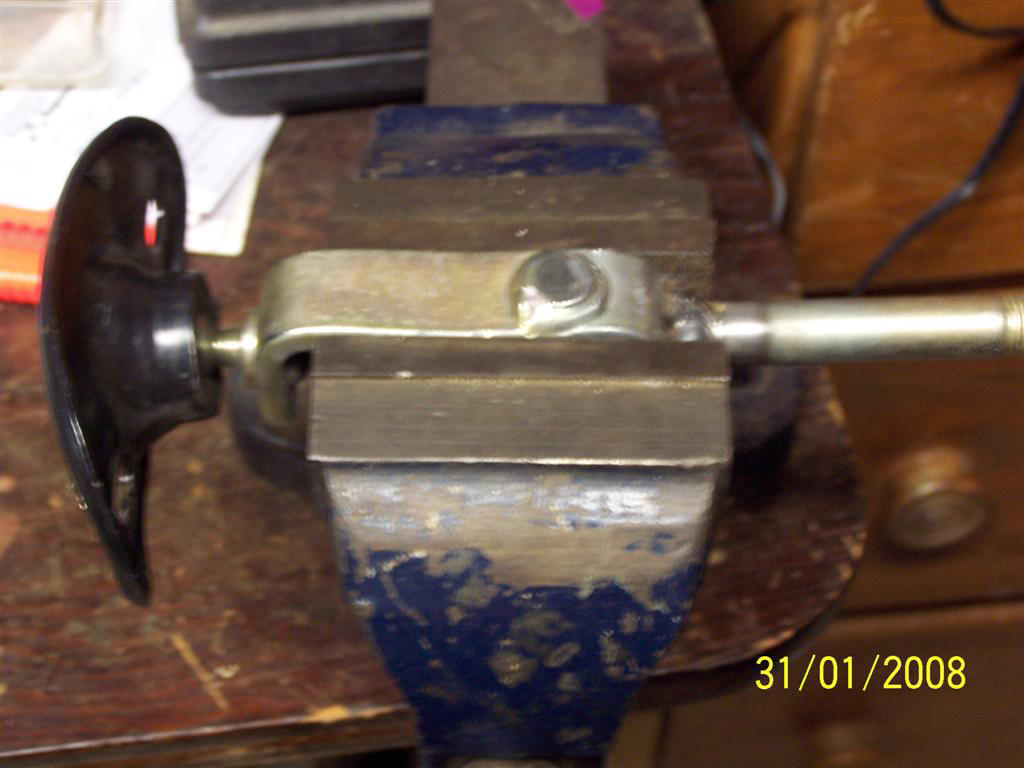
Above is the bolt tack welded in place. I re-positioned the shifter in the vice and will now complete the weld and then cut off the head of the bolt and grind down the welds.
Above is the completed weld with the bolt head cut off and the weld ground down.
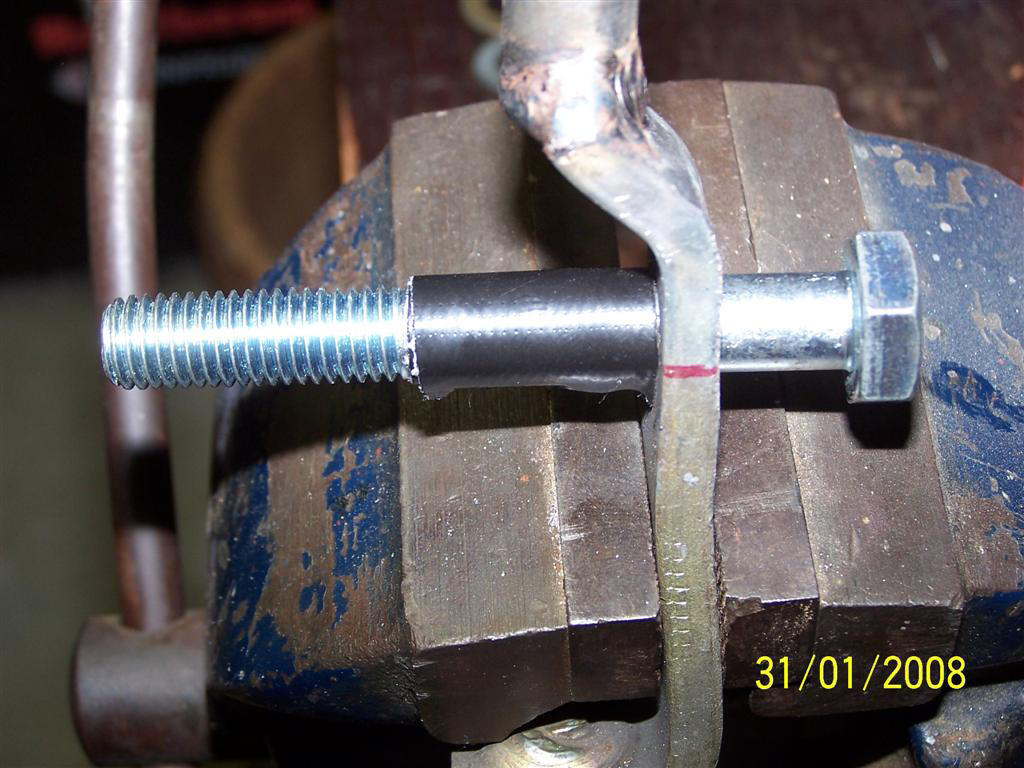
I then put the two washers and the two nuts on the new stub and then cut the remaining threads off leaving approximately 1/16” of threads above the two jamb nuts. You should end up with something that looks like the photo below.
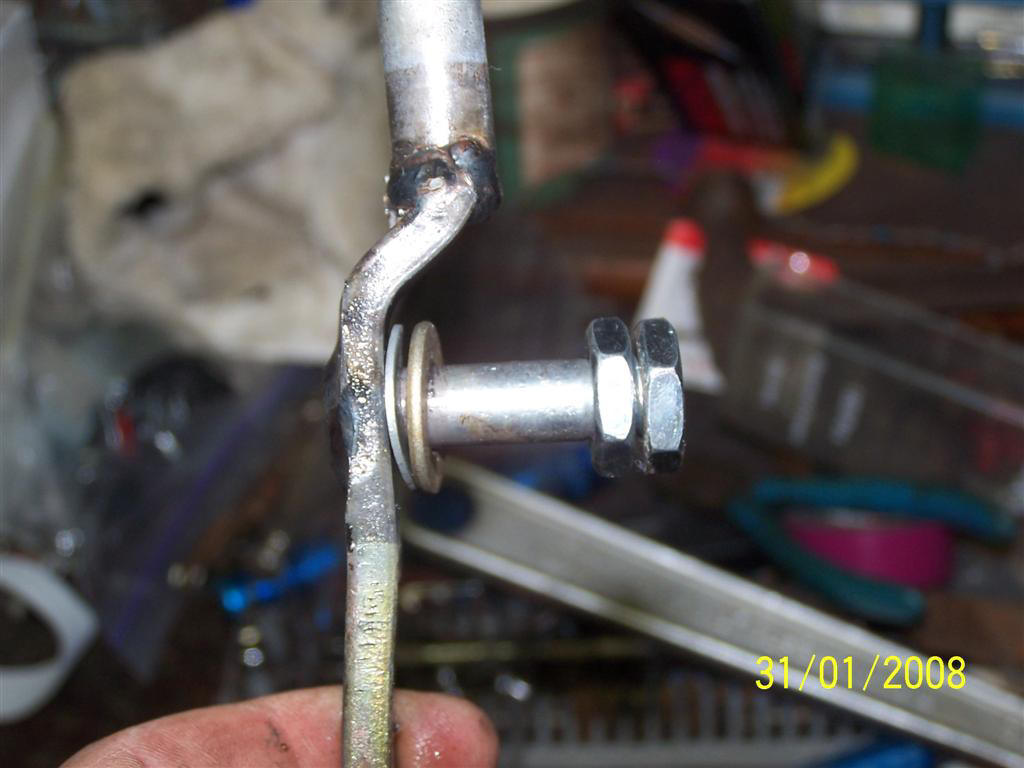
Note: Bolts are loose in photos
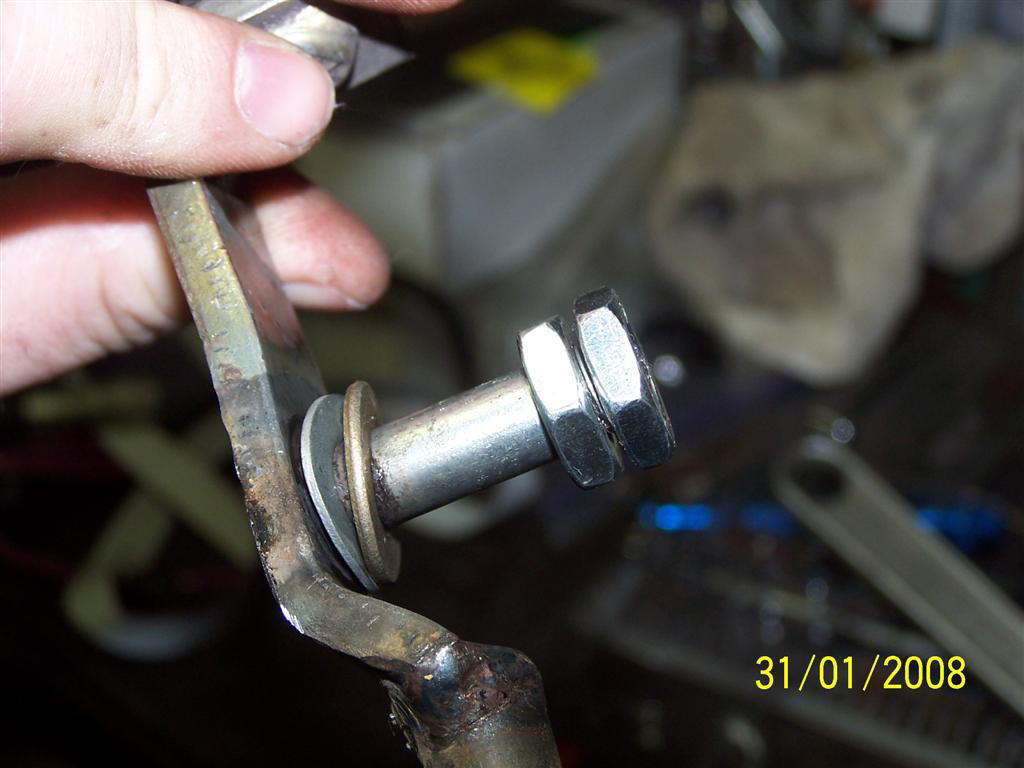
Note: Bolts are loose in photos
Remove the nuts and file down/round off the end of the threads making the nuts easy to install and removing any sharp burs
You are now ready to reinstall you shift lever in the car.
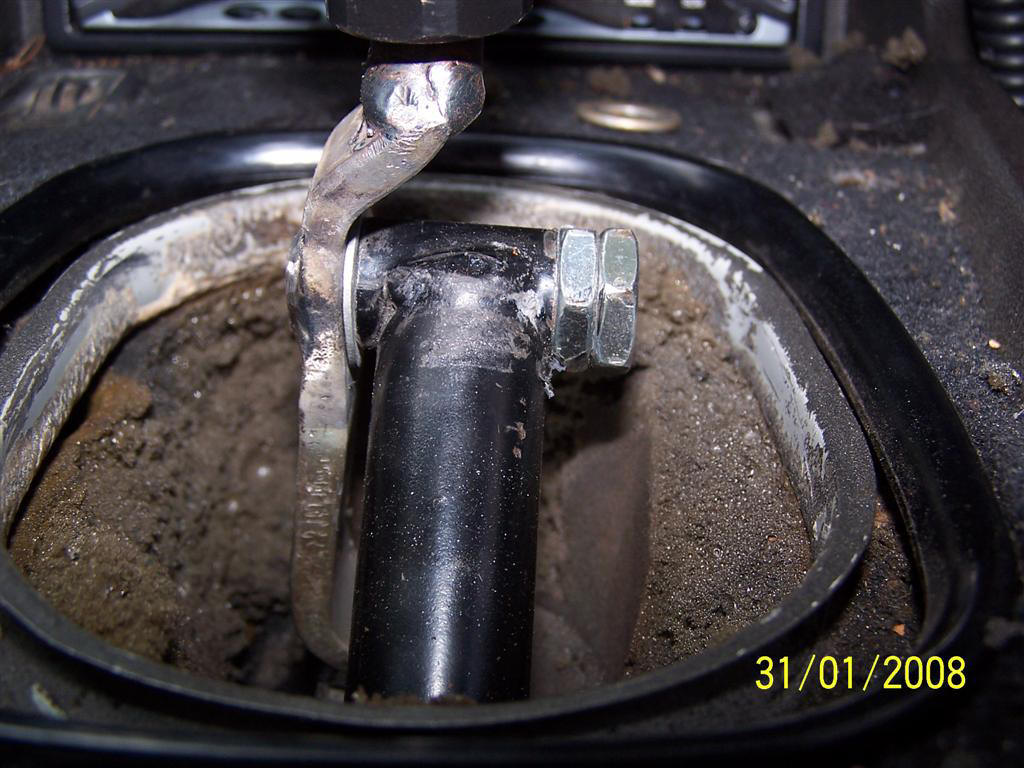
Once the shift lever is reinstalled place the spring washer on the stub against the lever. Put a dab of grease on the non threaded area of the stub then install the shift rod on to the stub being carful not to get any grease on the threads. Next install the washer and put a dab of lock tight oh the threads and install the nuts. Tighten the inner nut until it is hard to move the shifter for and aft. When this occurs back off the nut until you just start to see space at the spring washer (less than a mm). When this occurs tighten the outer nut down locking things in place. Try your shifter. There should be little if any side to side play but still move for and aft relatively easily. Loosen the nuts and adjust as necessary. Reinstall your shift boot and knob.
The improvement in my shifter was incredible and better yet the whole process took less than an hour to complete.
Here is the completed instillation.
Use the information contained here in this document at your own risk.